Summary
Below you will find information, hints and manuals for dealing with videos in moodle.
These instructions are intended for users of the e-learning platform of the University of Jena according to their roles and rights.
How to get videos (from your lectures) into moodle |
|---|

Plan your lectures (via Friedolin)
Upload videos yourself

Reuse videos
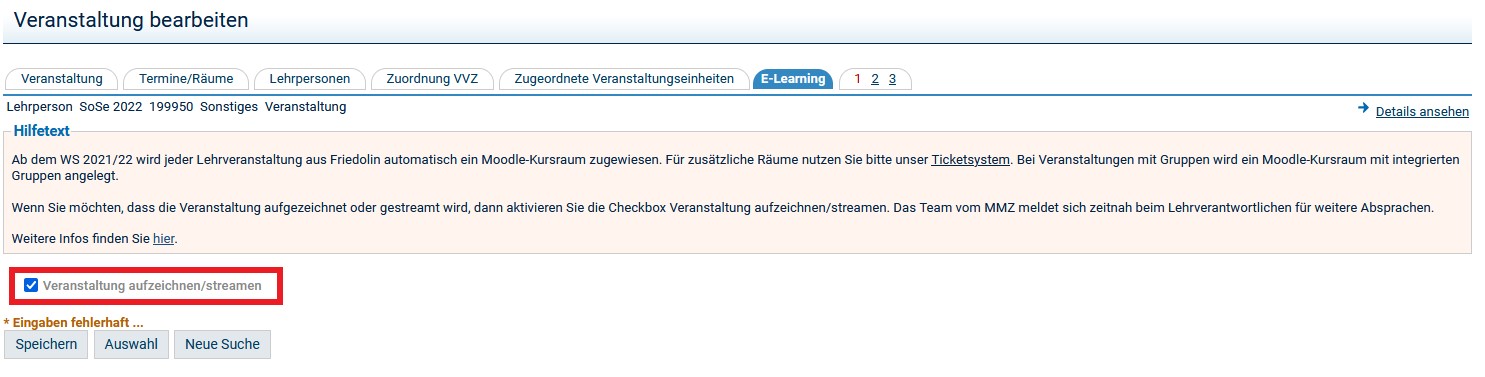
If you would like to record and/or stream your course, please activate the following checkbox in Friedolin:
In the e-learning tab you will find the option Record/stream event - please check the box here.
All necessary information is thus sent to the MMZ, and the event can be planned accordingly. After the event, the finished videos will be stored in your Moodle room and you can make them available to your students.
Alternatively, you can of course also use videos you have recorded/produced yourself.
Please use the block Opencast videos in your Moodle course room to upload such a video - the corresponding instructions can be found further down on this page.
Create a course backup and check the Include Opencast videos in this course checkbox.
or
Import a series.
Both variants are described in more detail in the Reusing videos from another course section.
Embed Opencast videos in the Moodle course room |
|---|
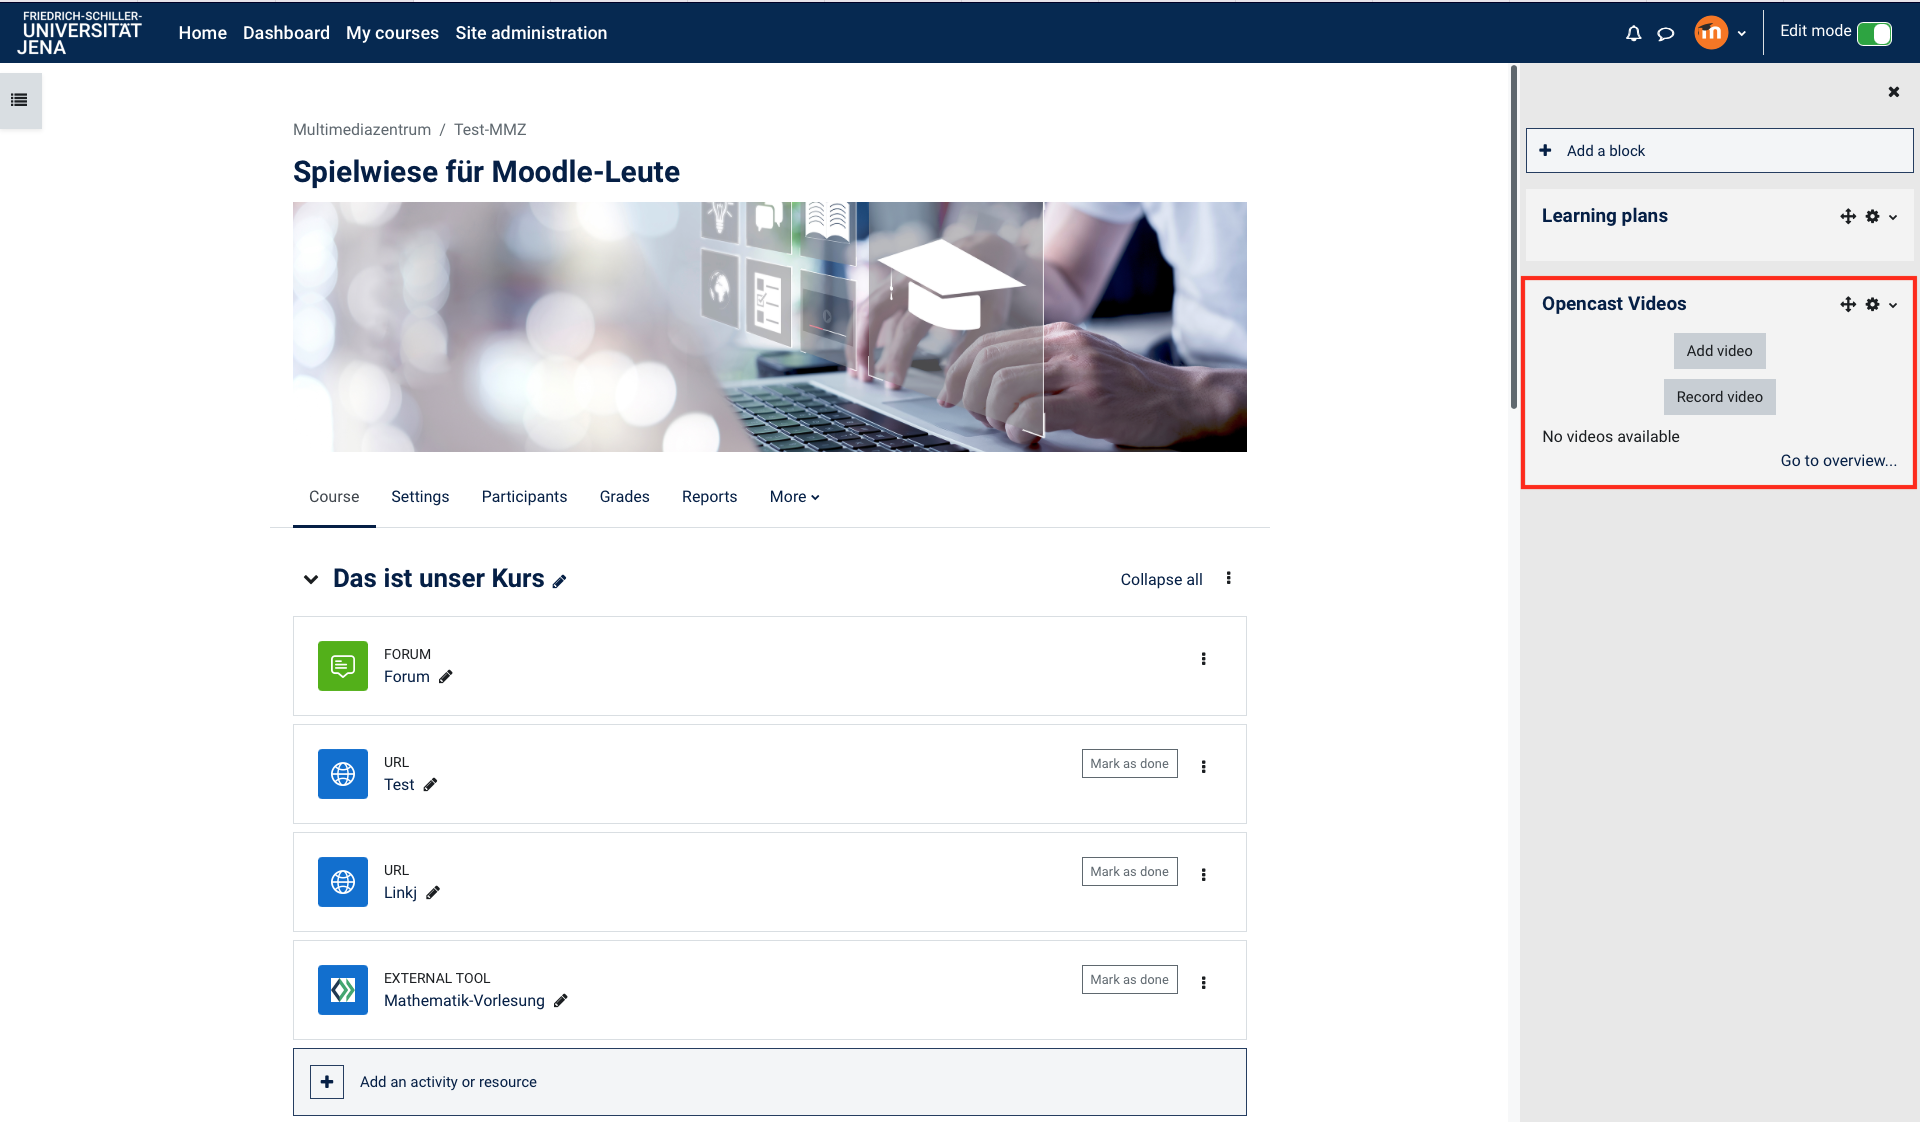
In order to be able to embed videos with Opencast in your Moodle course, you first need the Opencast videos block, which you add to your course as follows:
To embed videos in your Moodle course with Opencast, you first need the Opencast Video block, which you can add to your course as follows:
- Switch to one of your courses in Moodle. Then click on activate editing in the upper right corner.
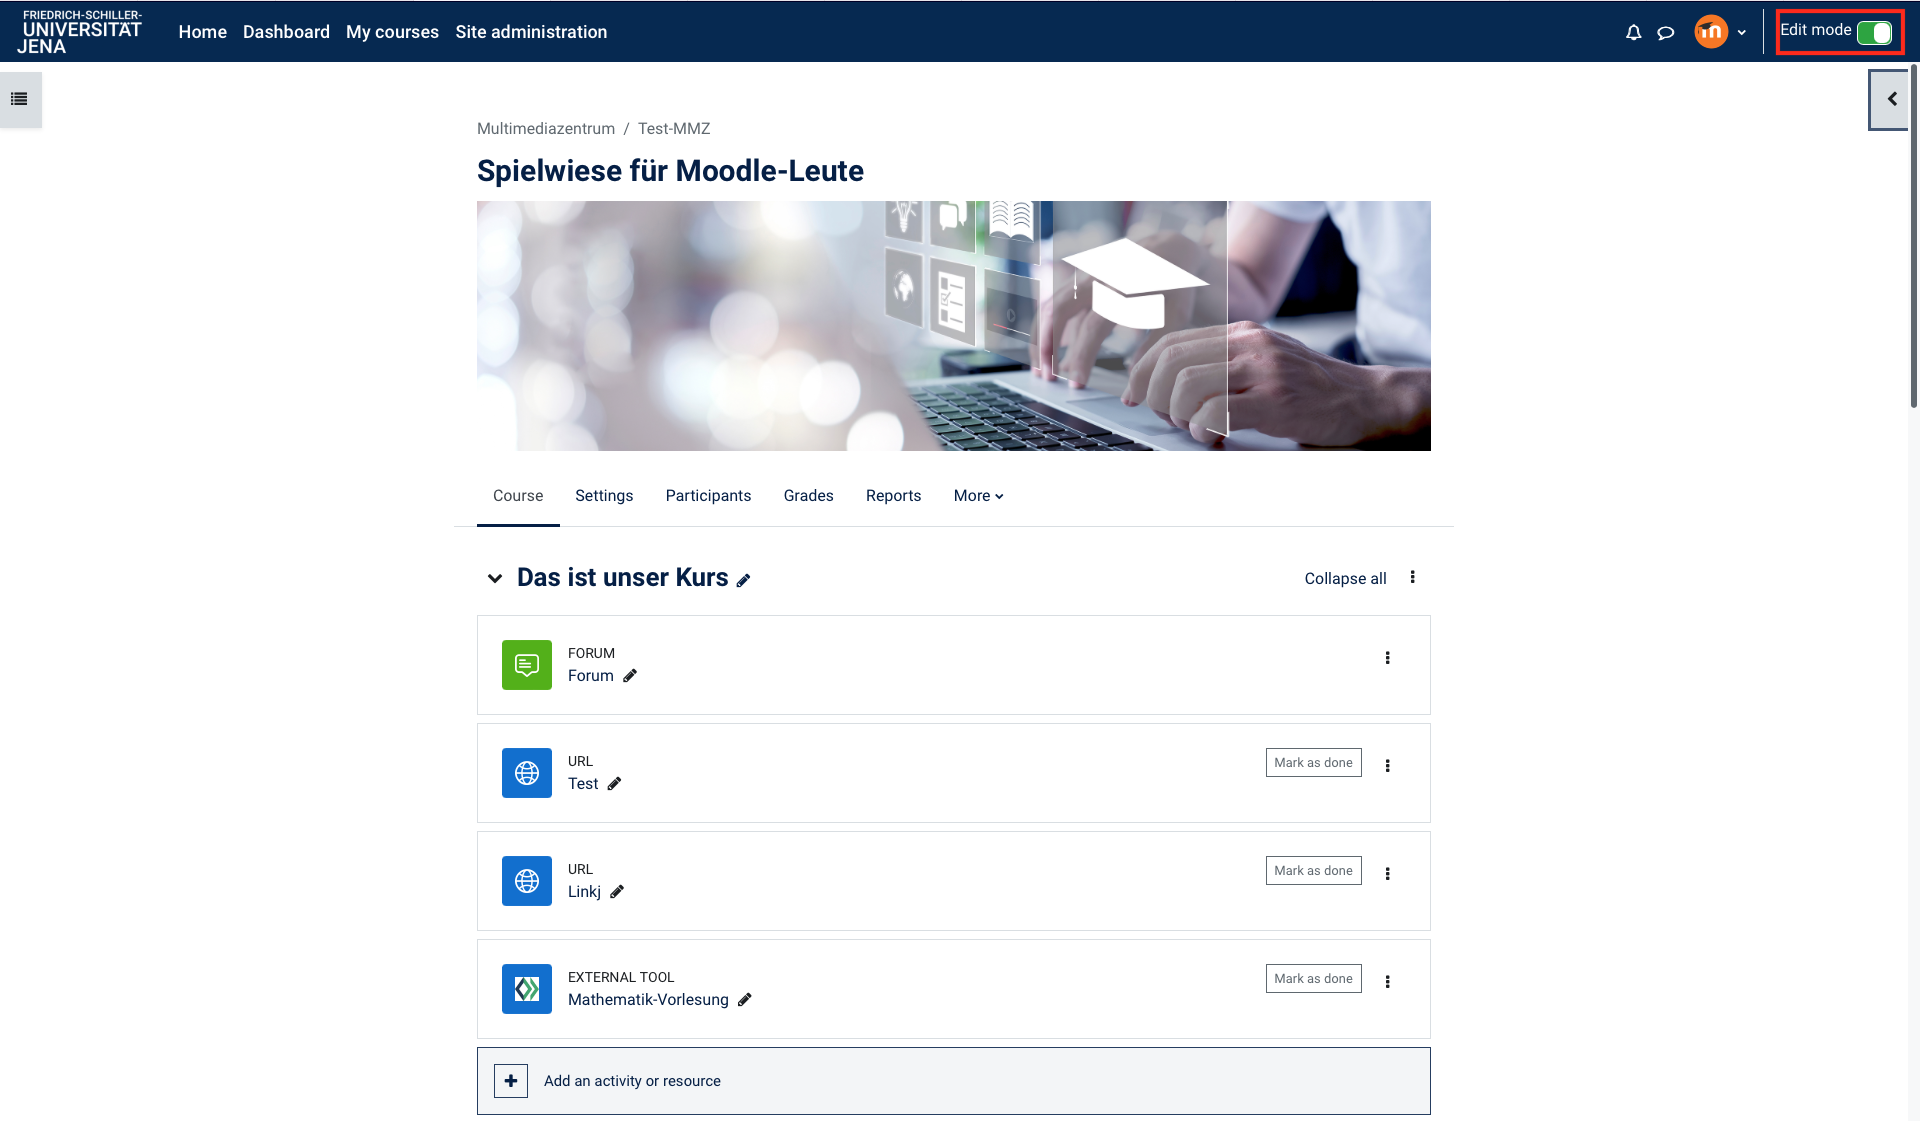
In the left area - where your courses are listed - at the very bottom the button add block appears.
If you don't see this button right away, scroll all the way down! If you have many courses, the list on the left may be very long, the button always appears at the bottom. So don't forget to scroll.
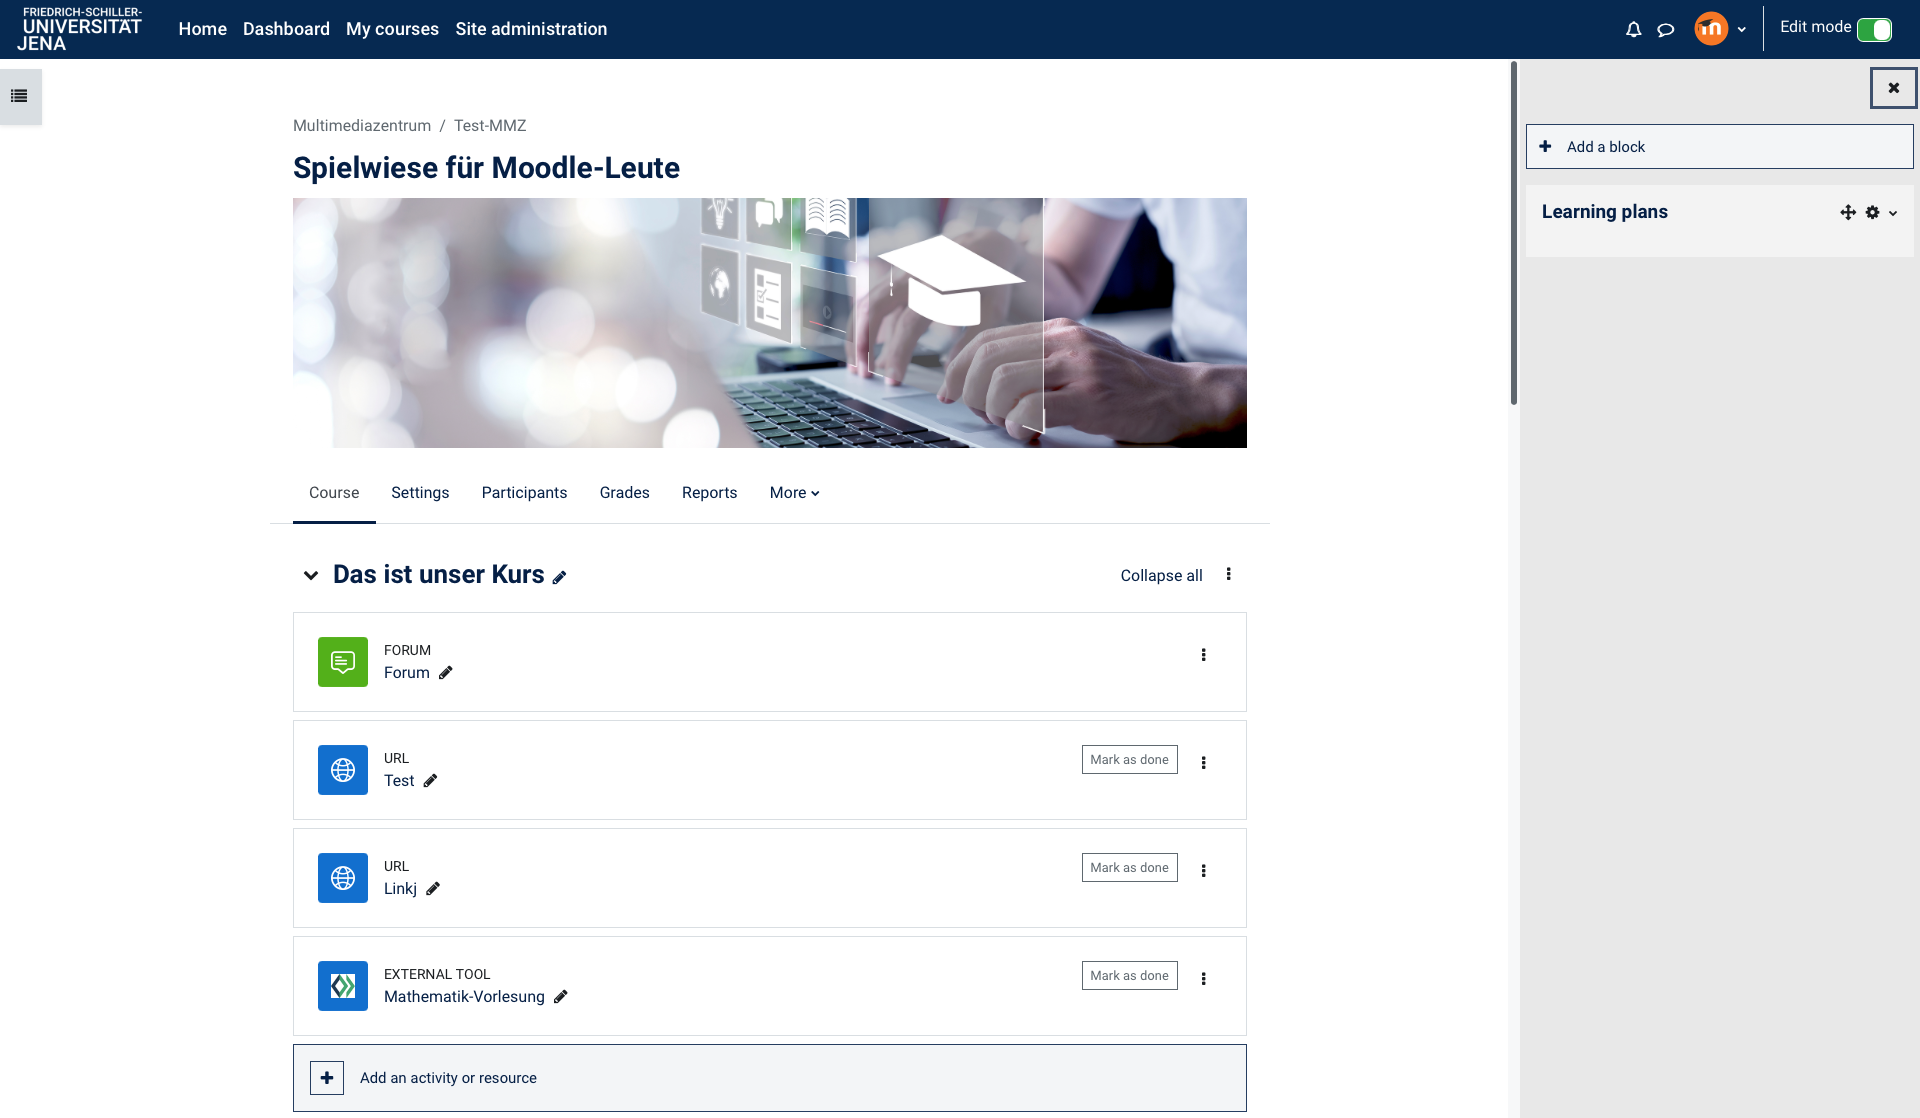
- Click on add block and select the Opencast Videos option in the dialog that opens to add this block to your page.
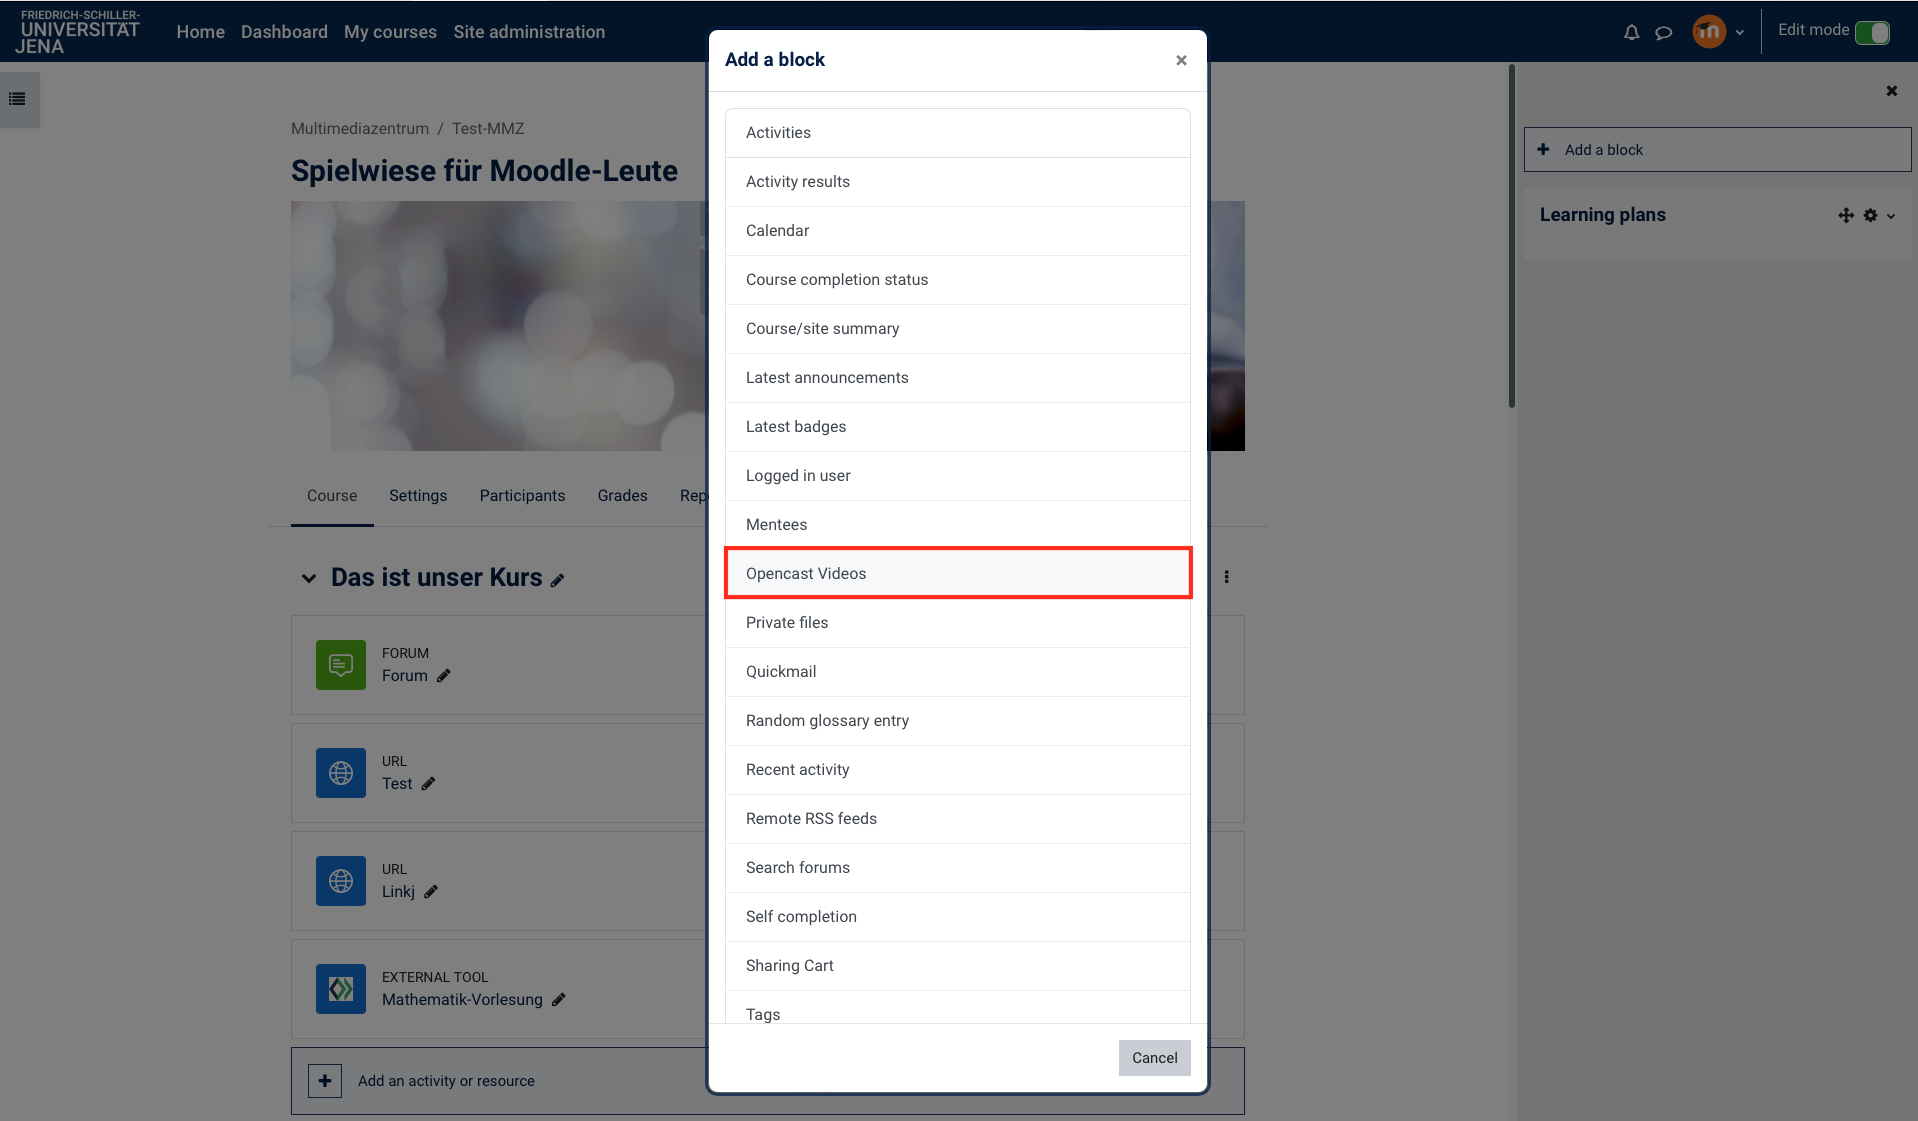
- The new block will now appear in the window at the top right.
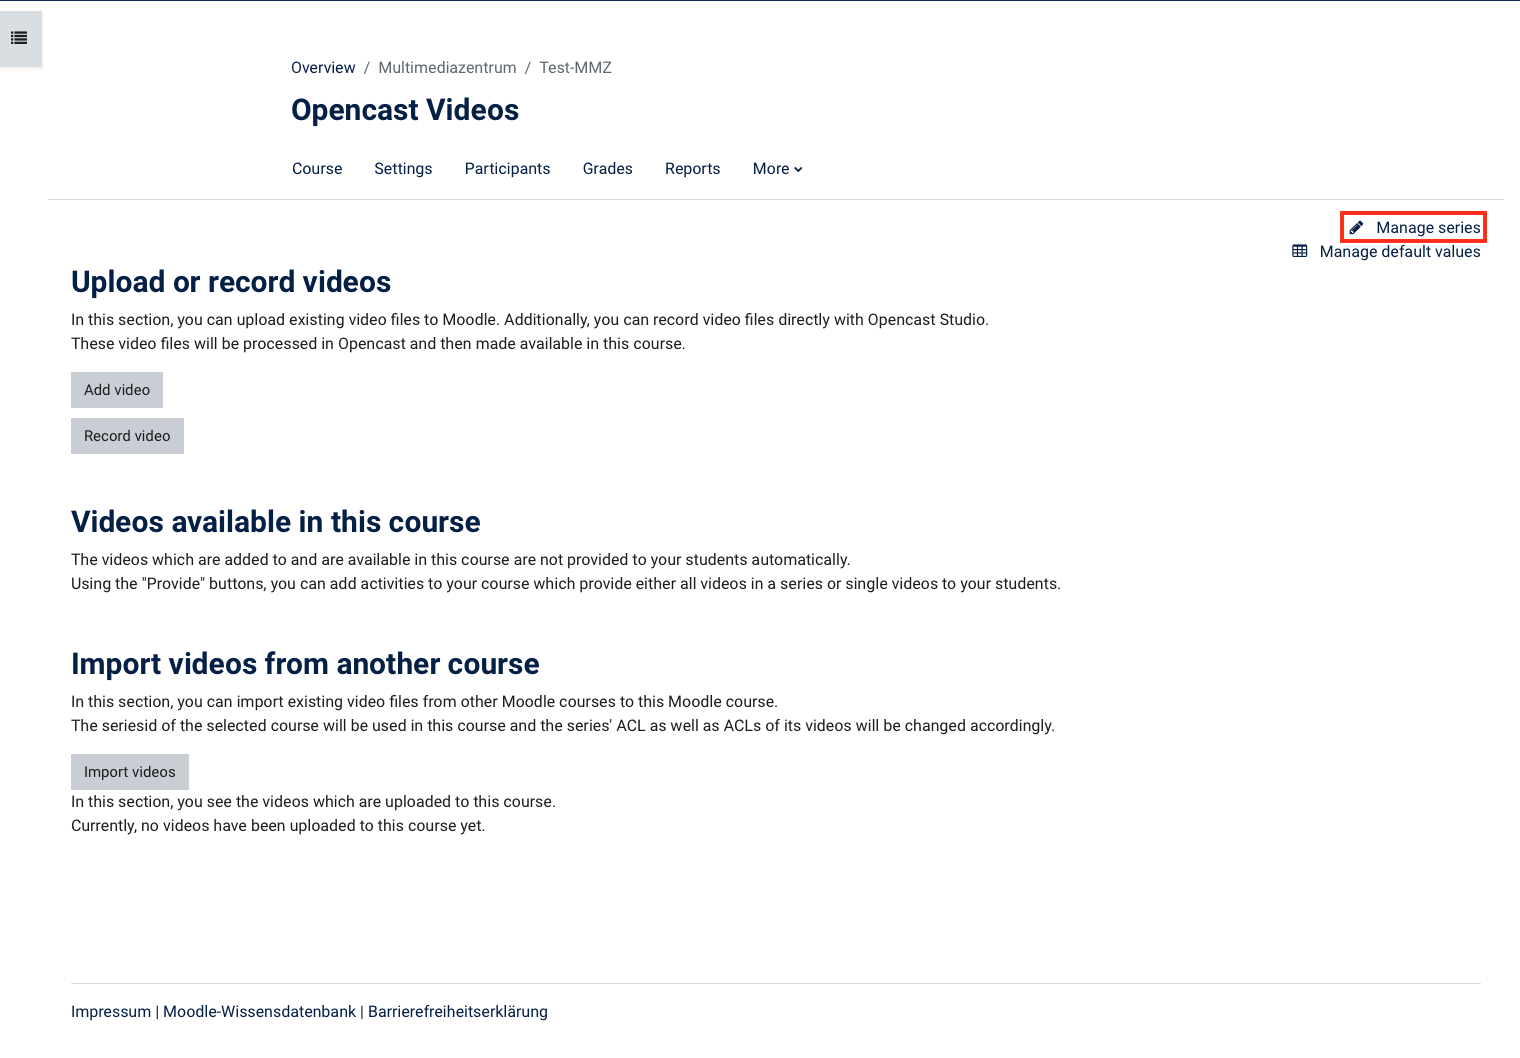
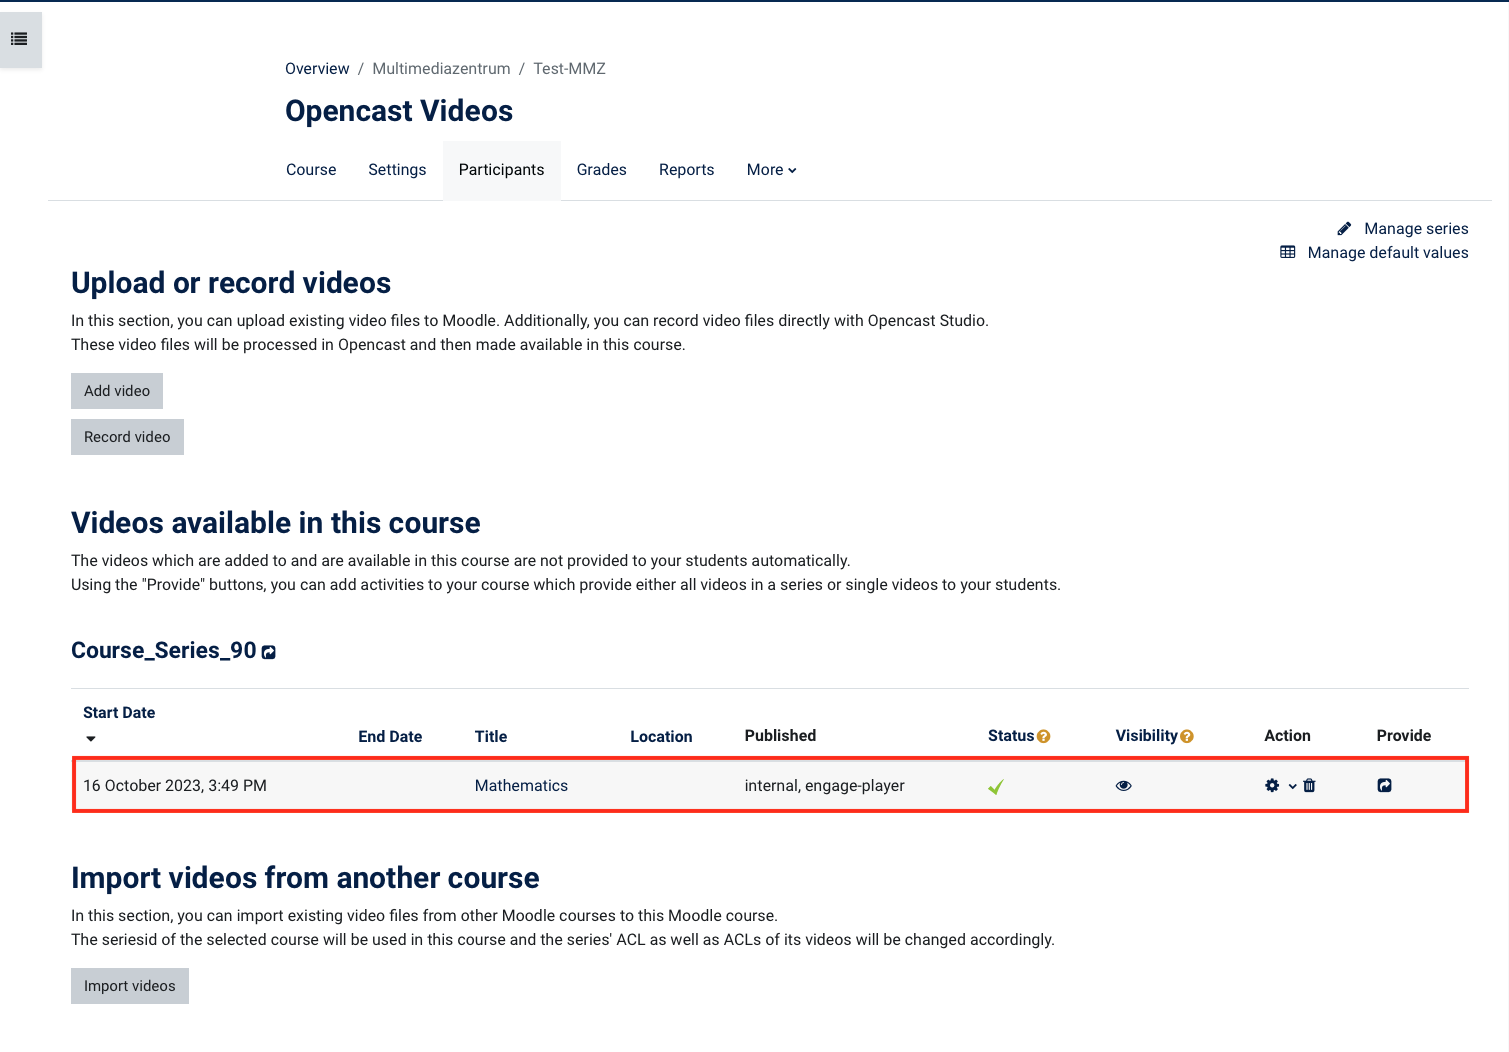
You are using the recording technology in one of the lecture halls and you would like these videos to be placed in your Moodle course? So that we can set this up for you, you have to set up a one-time connection to the Opencast servers with Moodle. This is done by creating a new series. In the Opencast block you go to overview ... and then to manage series. You can now create a new series.
Alternatively, you can also record a short test sequence of a few seconds in your course via "Record video".
Please provide the MMZ (mmz@uni-jena.de) with the course ID. This means that we have all the information we need about your course in the Opencast system and can link the videos from the lecture halls.
In Moodle you have the option of uploading an existing video in order to make it available for your course. To do this, follow these steps:
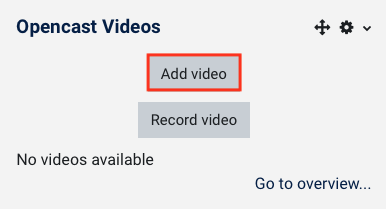
- Click add video to open the video upload dialog.
Enter a meaningful title in the Metadata area and add (optional) additional metadata. To do this, click on show more ...
You can enter further information in the extended dialog.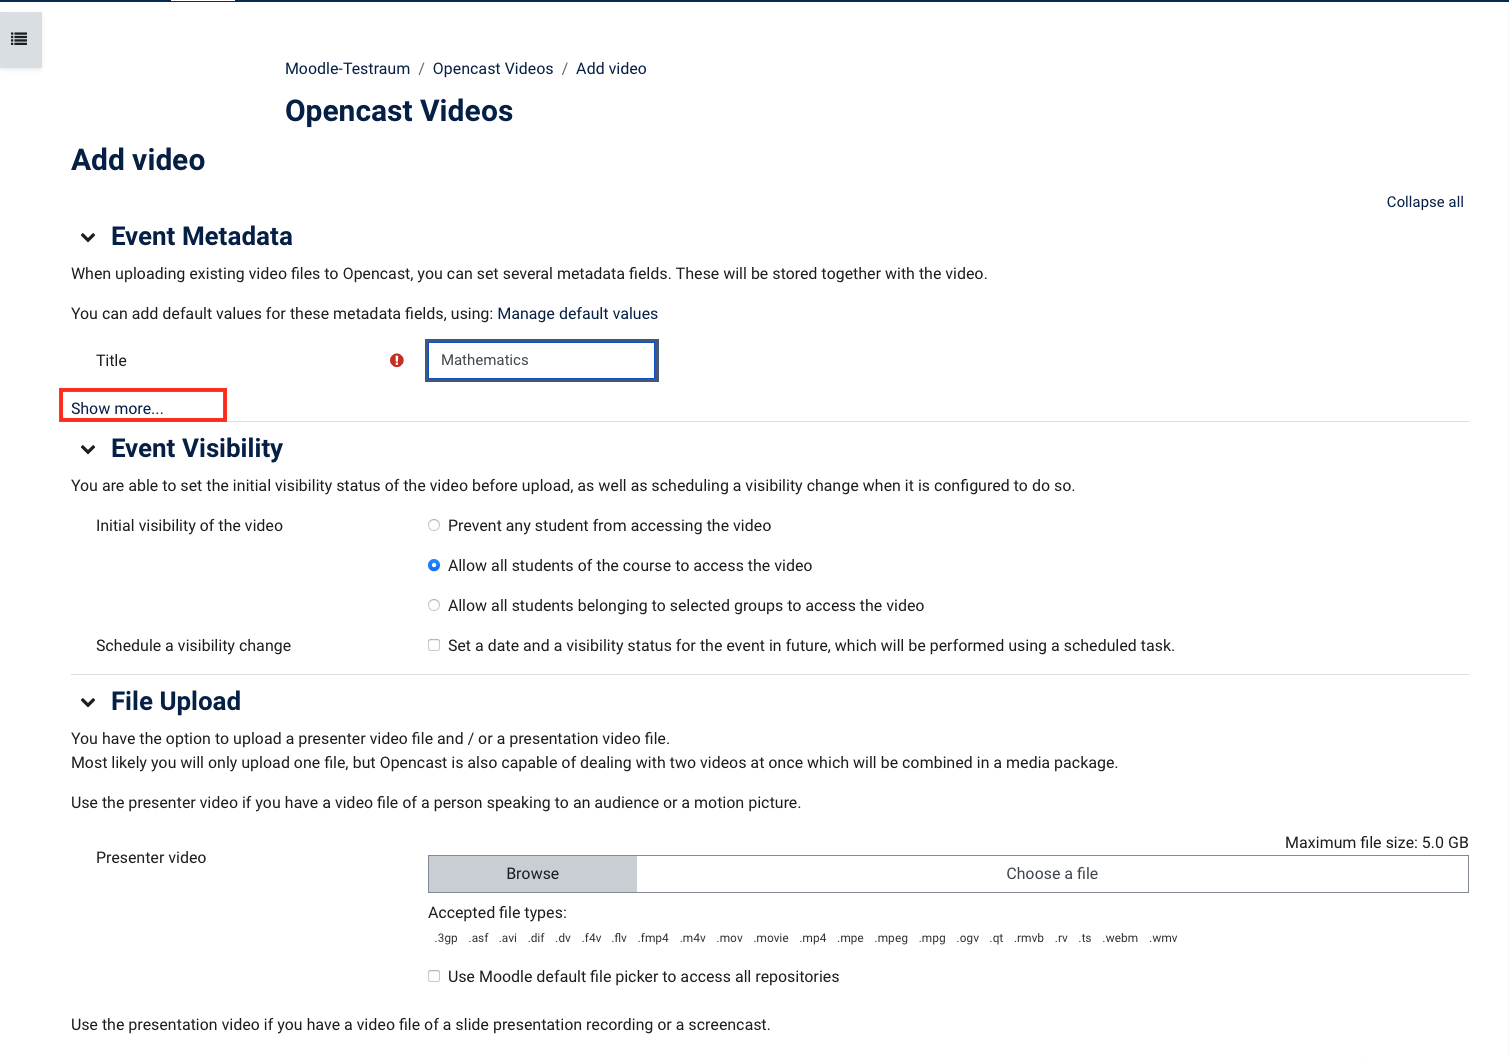
In the Event Visibility section, set the initial visibility status of the video when uploading.
There are two main sections under the upload file section - choose one option:
(1) Presenter video
Use the presenter video if you have a video file with a recording of a speaker or a film.(2) Presentation video
Use the presentation video if you have a video file with the recording of a slide presentation or a screencast.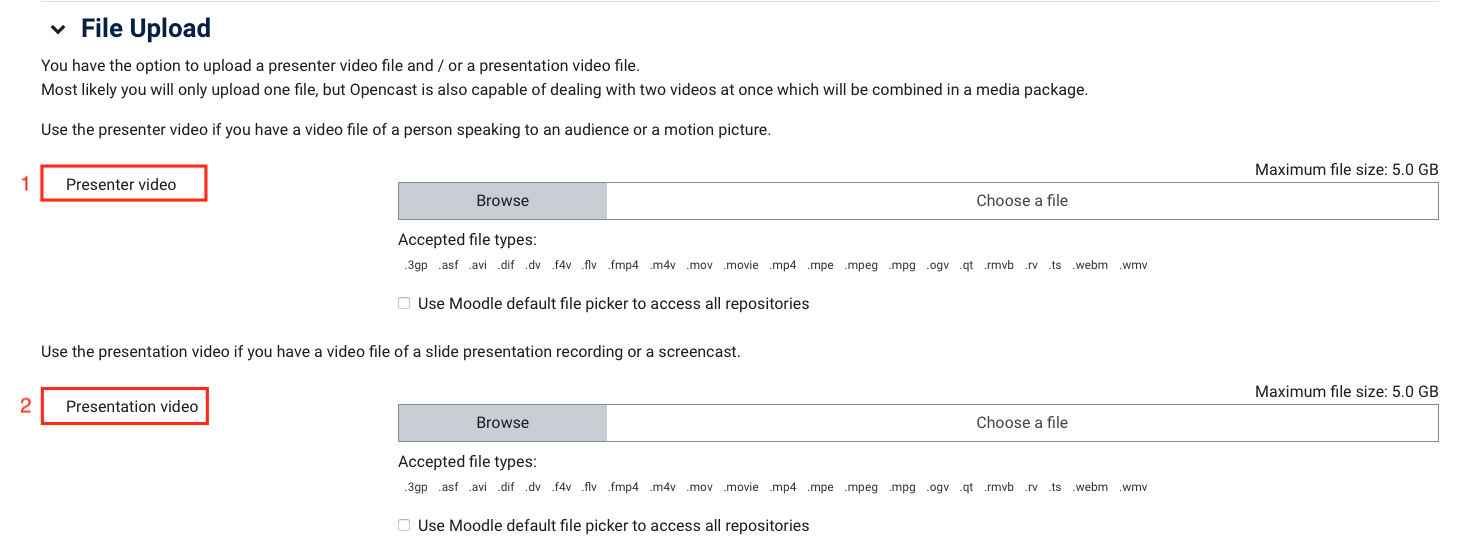
Uploading two videos can be useful if an Opencast Studio upload has failed and you want to manually submit your saved videos. For this purpose, the corresponding dialog would then have to be used for your video image and the presentation.
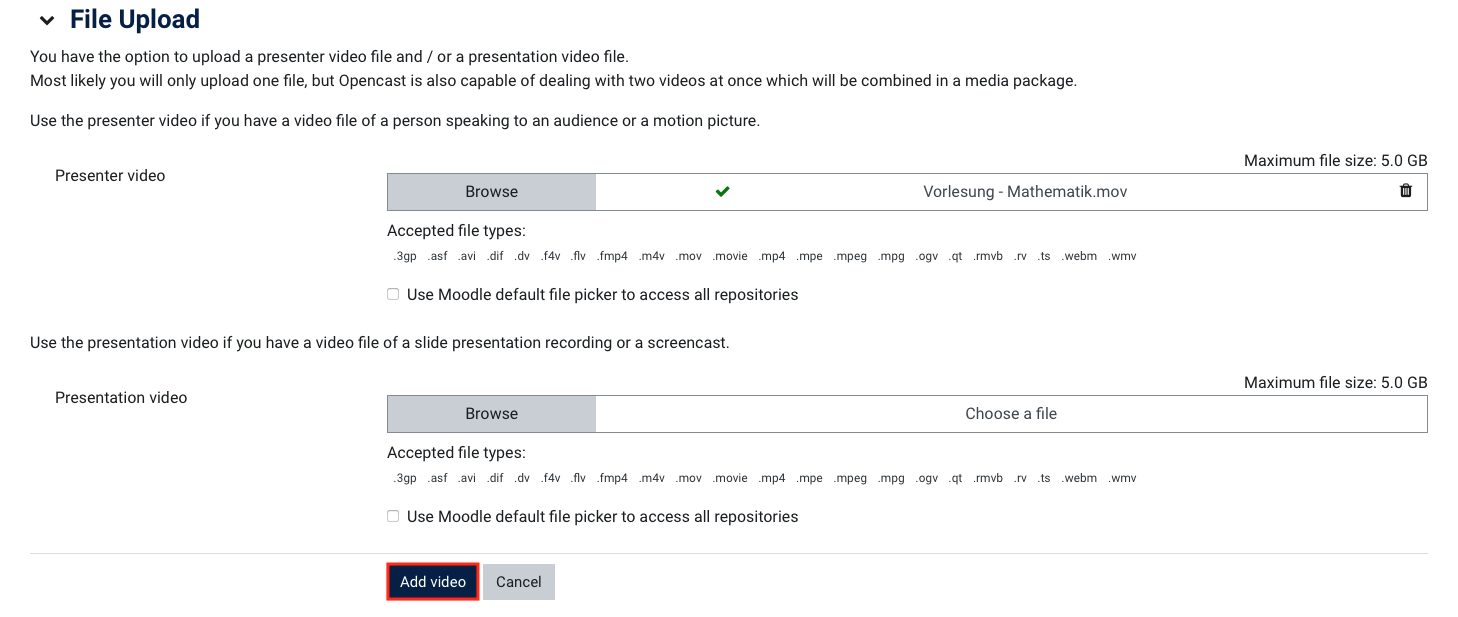
- After completing the upload process, click add video to complete the process. Opencast will now process the video in the background.
On the following page you can see the overview of your videos. Here you can control further actions - e.g. add another video or record a new video.
If you do not want to take any further actions here, click on your course on the left to return to it.
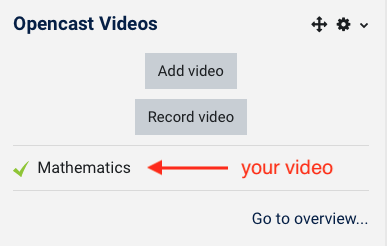
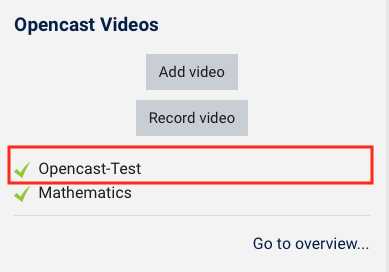
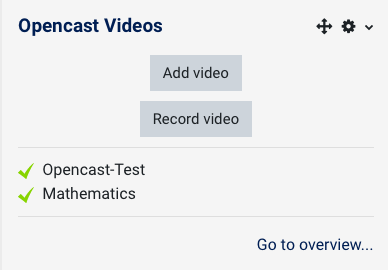
Your video will now appear in the Opencast Videos block.
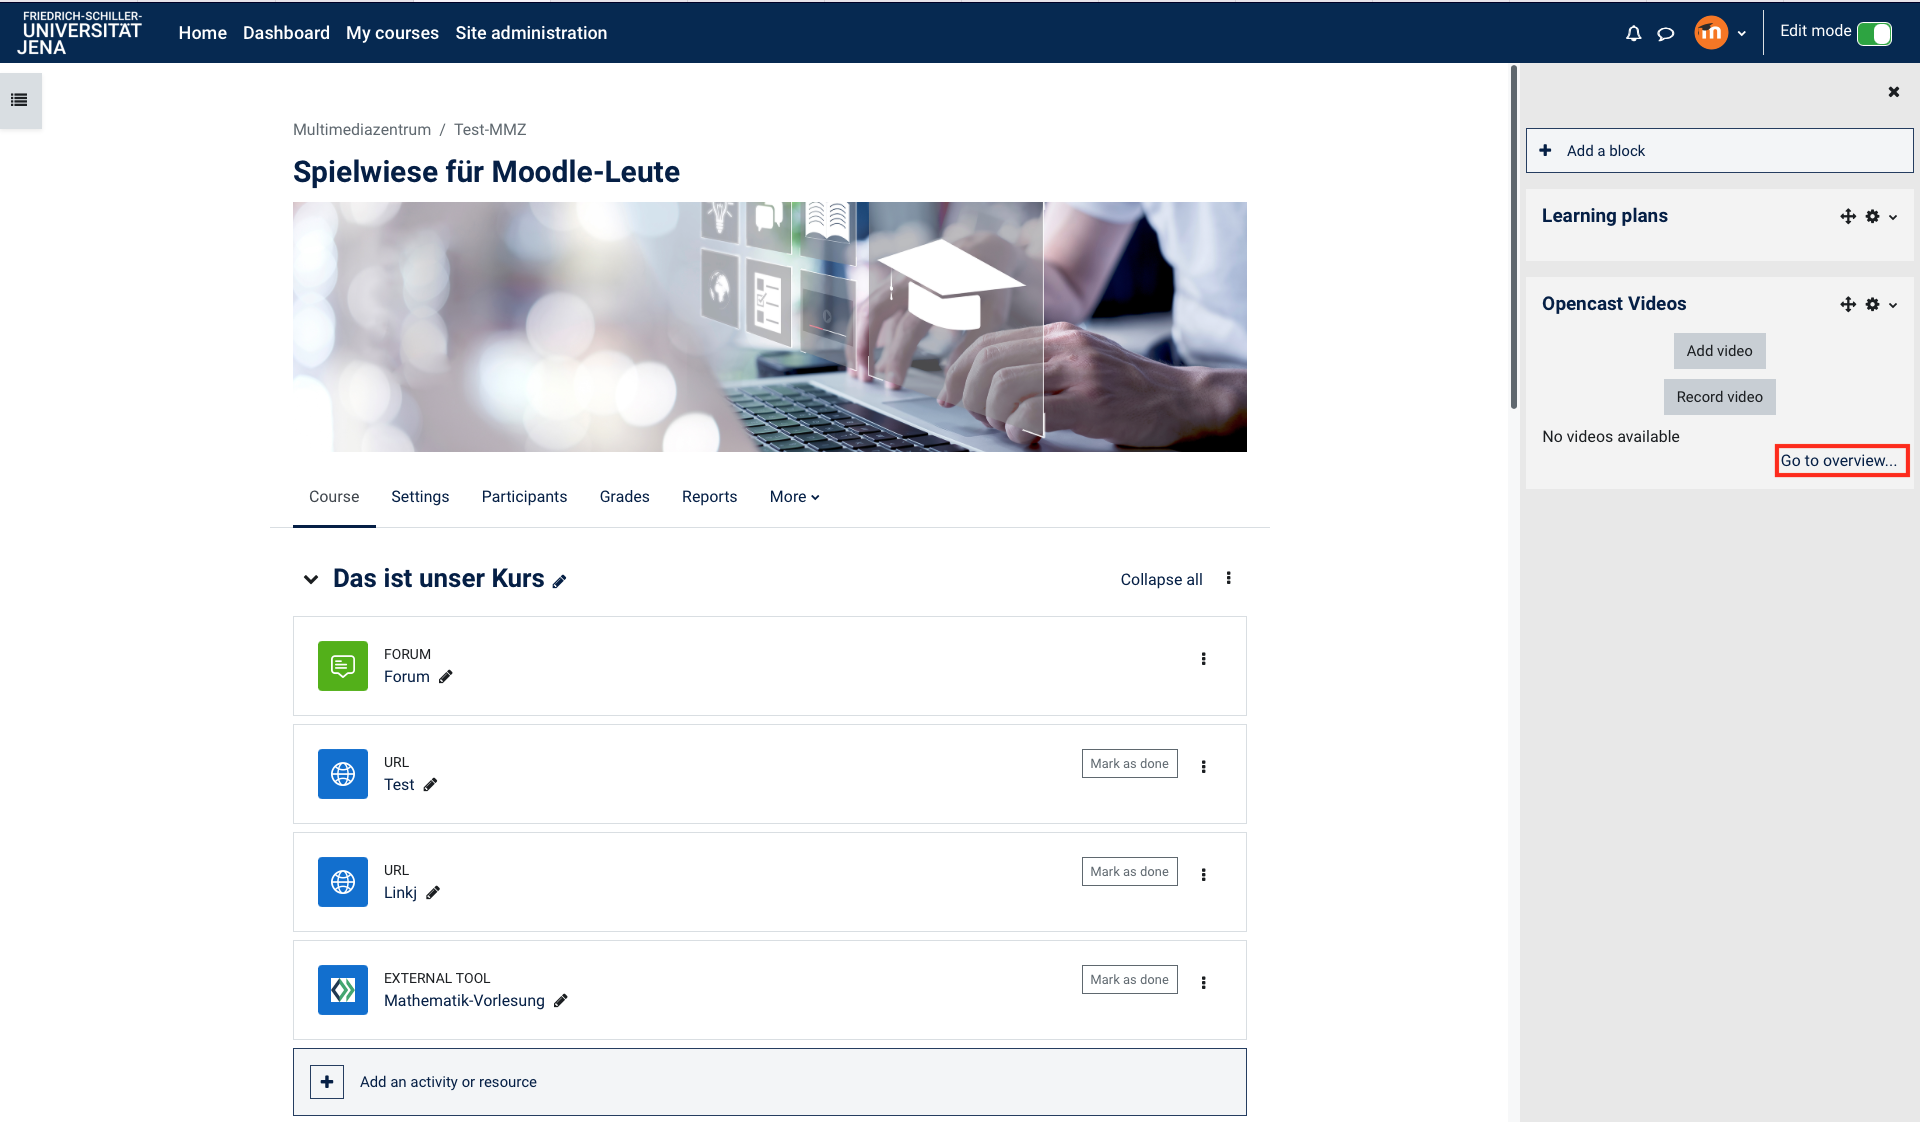
Click on overview... to get to your video overview and to make changes if necessary - there are a few options available (e.g. visibility; delete).
Please note that processing may take some time at peak times.
In addition to the option of uploading an existing video, you can also record your own video directly via Moodle. To do this, follow these steps:
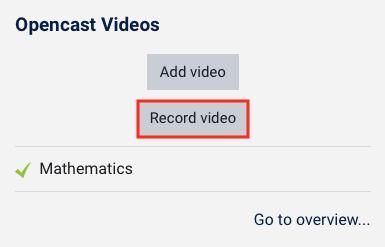
- Click record video to switch to the Opencast Studio user interface.
The use of Opencast Studio is described in detail in the section Instructions for Using Opencast Studio.


The advantage of recording a video directly from Moodle is that the video is automatically assigned to your course in the background and stored there.
Please download the video file for your own backup before uploading it to Opencast Studio. This is the only way to add the video to your course afterwards with a manual upload (see upload video manually) in the event of a failed upload.
After a successful upload, the video will also be processed in the background and then made available to your course.
Your video will now appear in the Opencast Videos block.
Click on overview... to get to your video overview and to make changes if necessary - there are a few options available (e.g. visibility; delete).
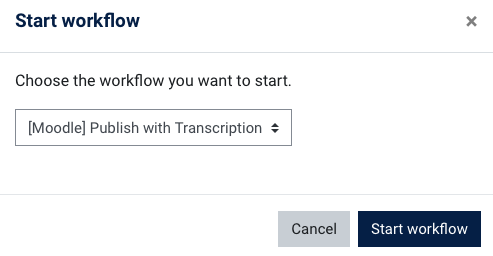
Create transcription of uploaded videos
If you want to add subtitles to your uploaded videos, follow these editing steps:
| In the Opencast Videos block, open the overview of videos uploaded in the course. Select the video to be subtitled and click the arrow next to the cogwheel in the Actions column. In the menu that opens, select the option Start workflow. |
|
| In the dialogue that opens, keep the current setting and click on Start workflow to initiate the creation of the subtitles. Processing now takes a moment - you can see this from the clock in the Status column. After the processing of the video is complete, the subtitles for the video are available. |
|

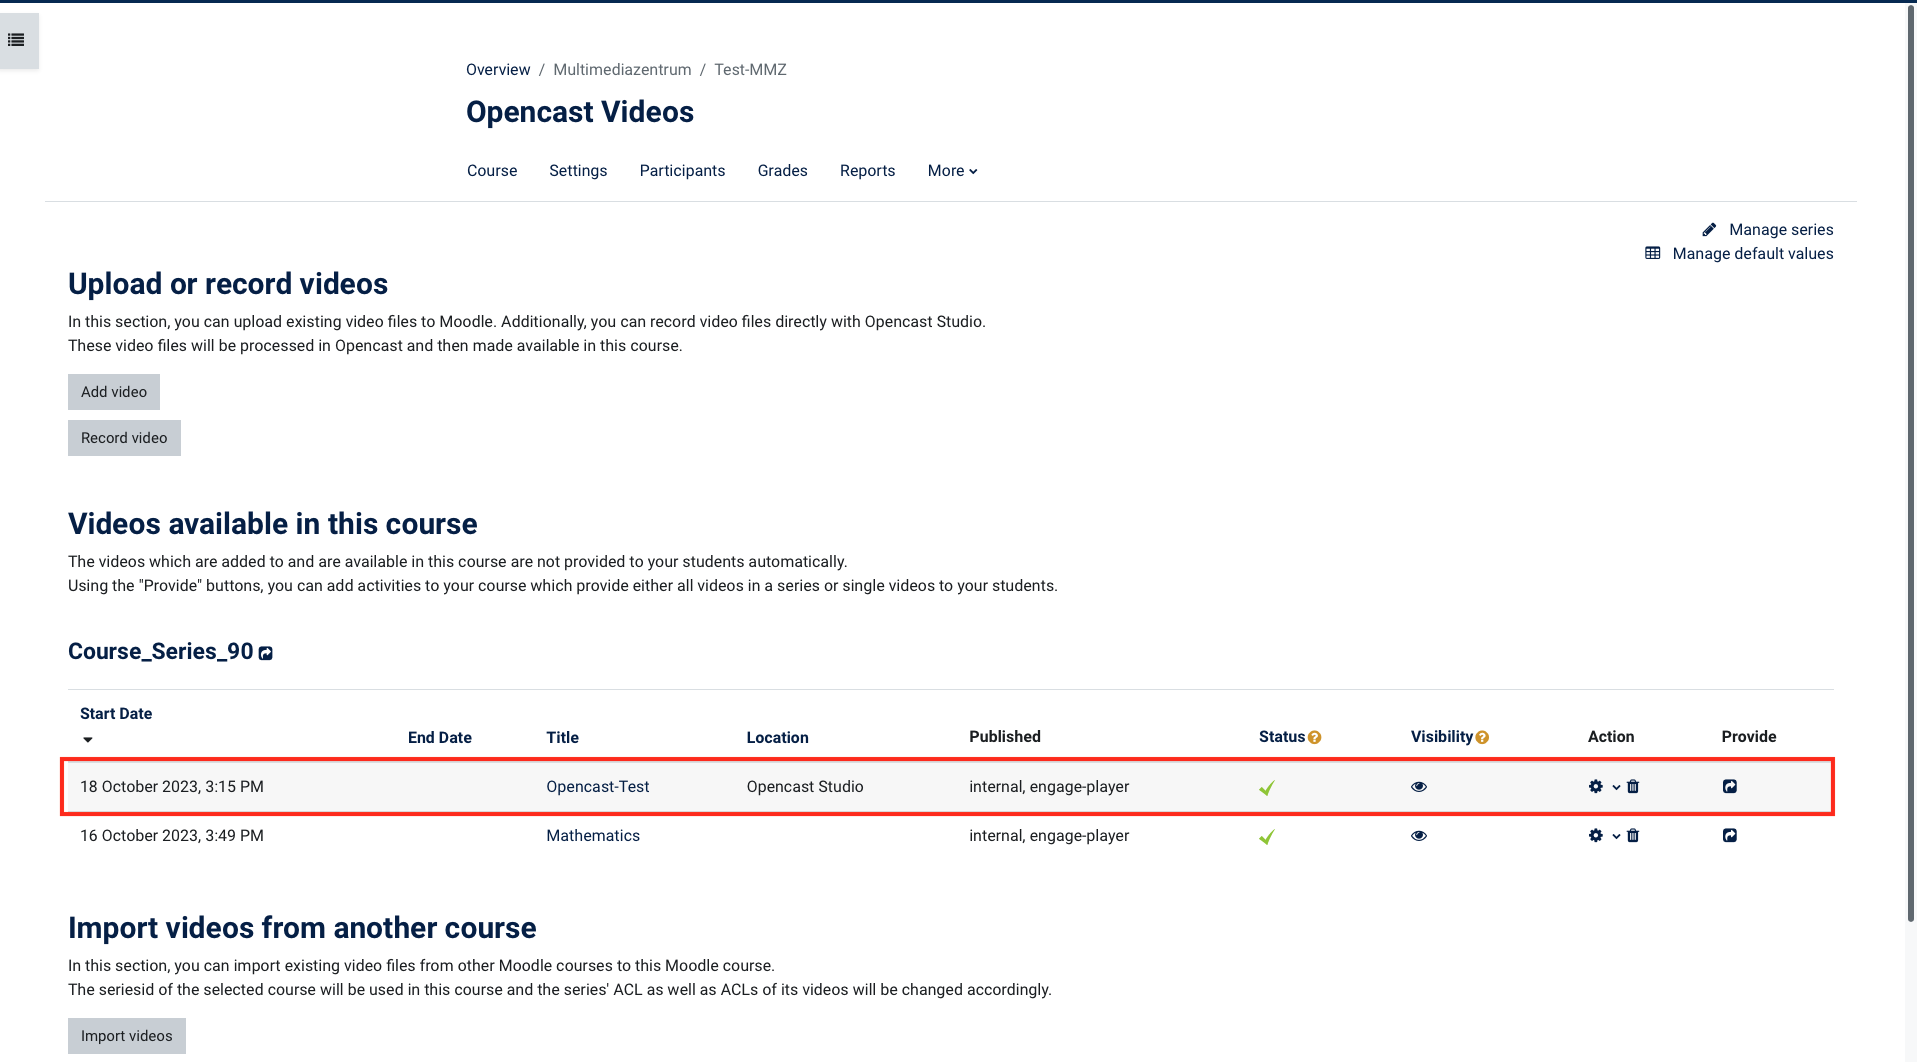
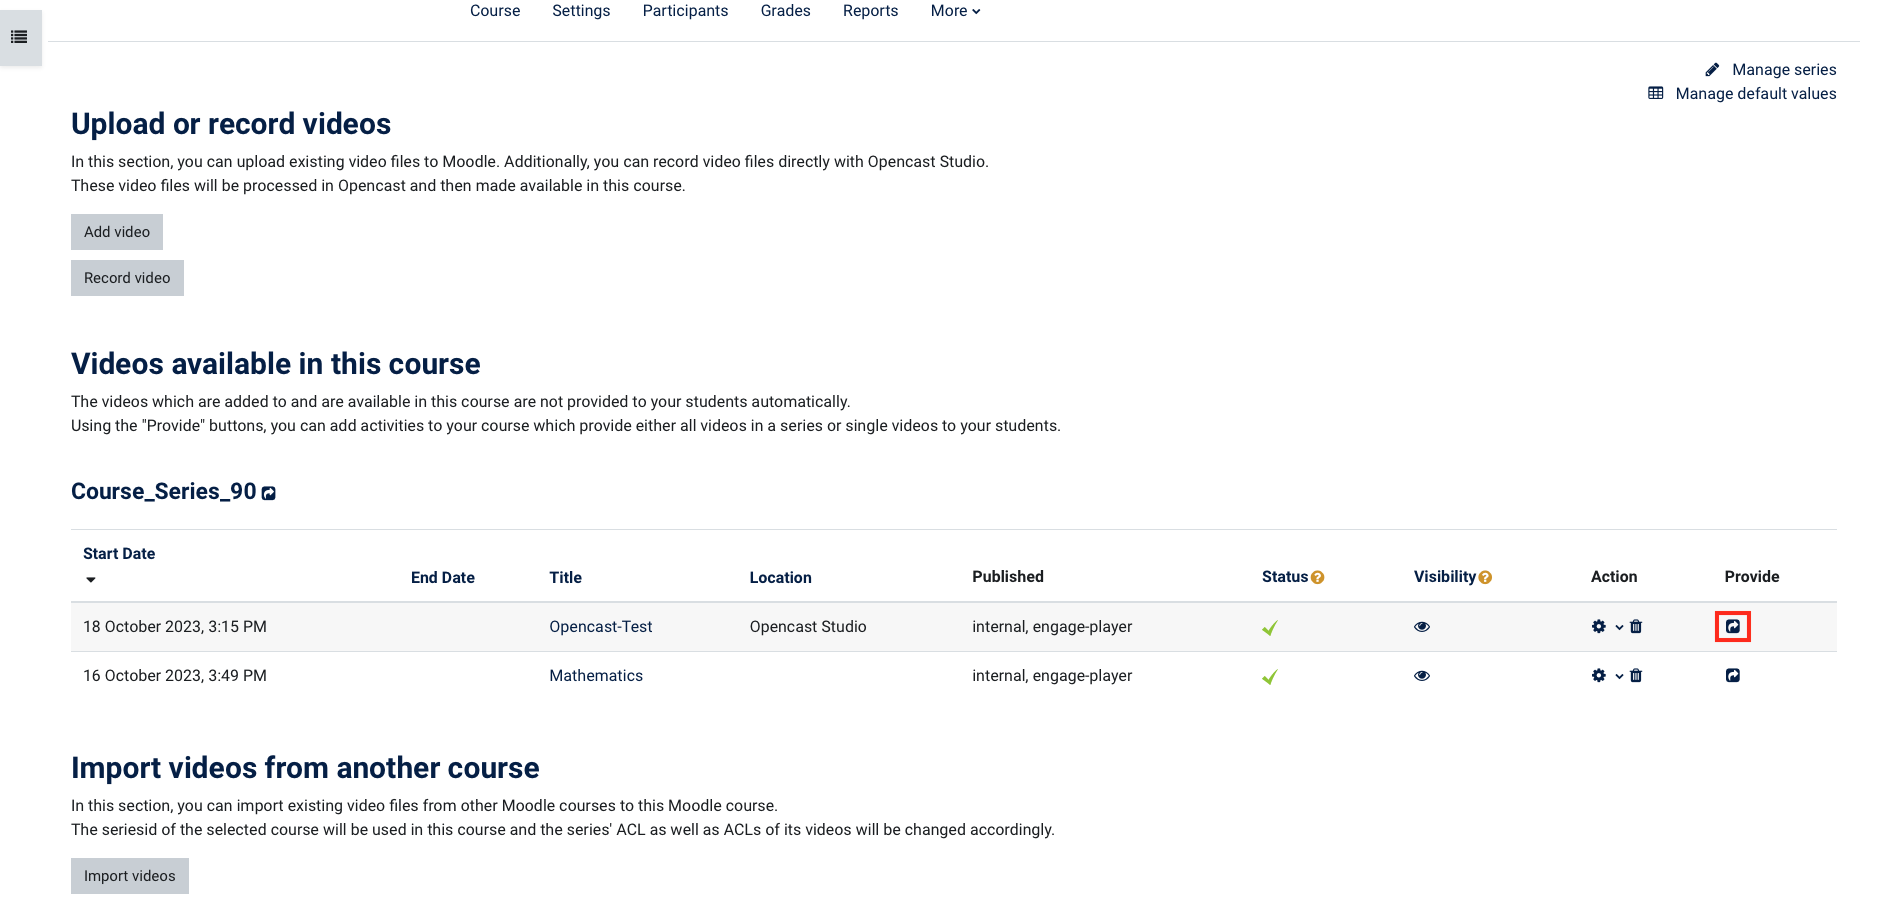
The videos that you have added to your course - by uploading or recording - are not yet visible to your students.
In order for your students to see the videos, you need to embed or place them in your course. You have the following three options:
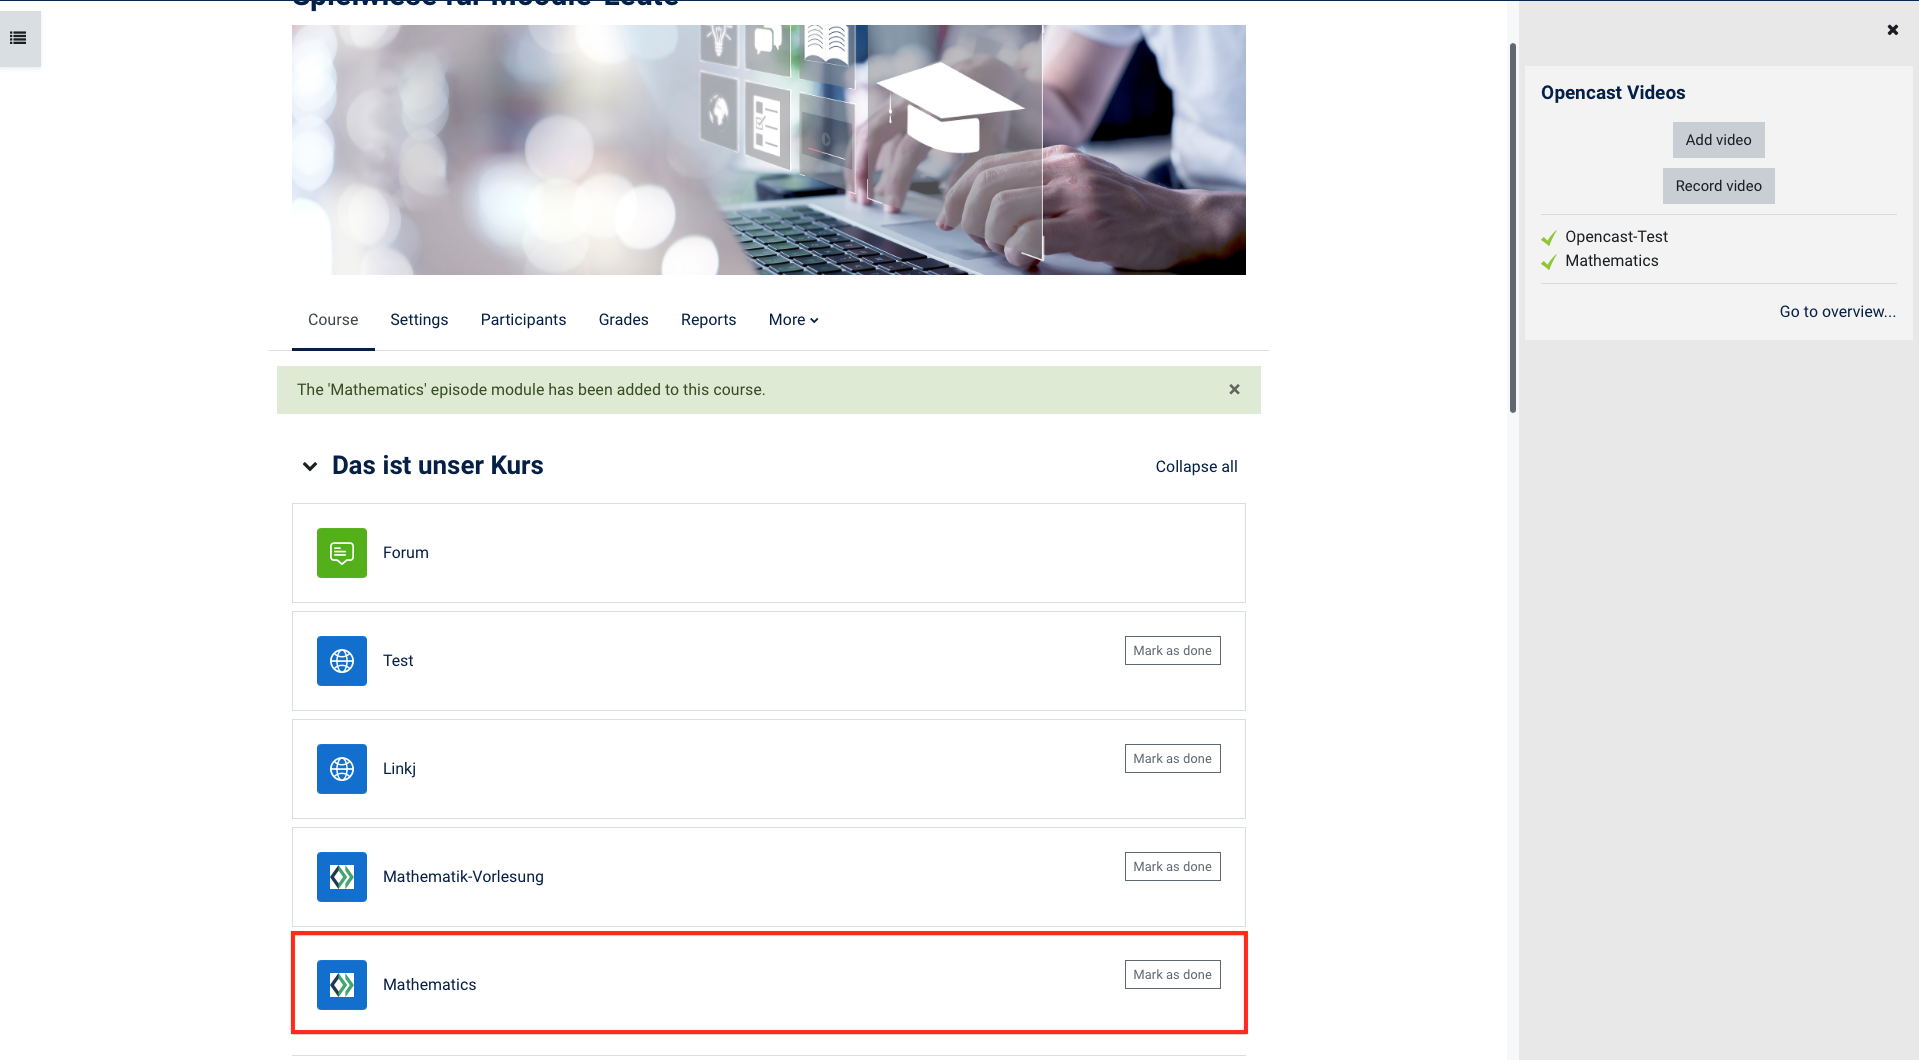
Option 1 To provide a video
- Click the provide button to add a single video to a topic or course section.
In the following window you have the option of adapting the title of the video, adding a description or making further settings.
As soon as you have finished entering your data, click on one of the two blue buttons:
Add an activity and return to overview
or
Add an activity and return to course
Enter details about the video and, if necessary, set certain requirements. For example, you could not post a video solution to a task until the participants met a certain condition.

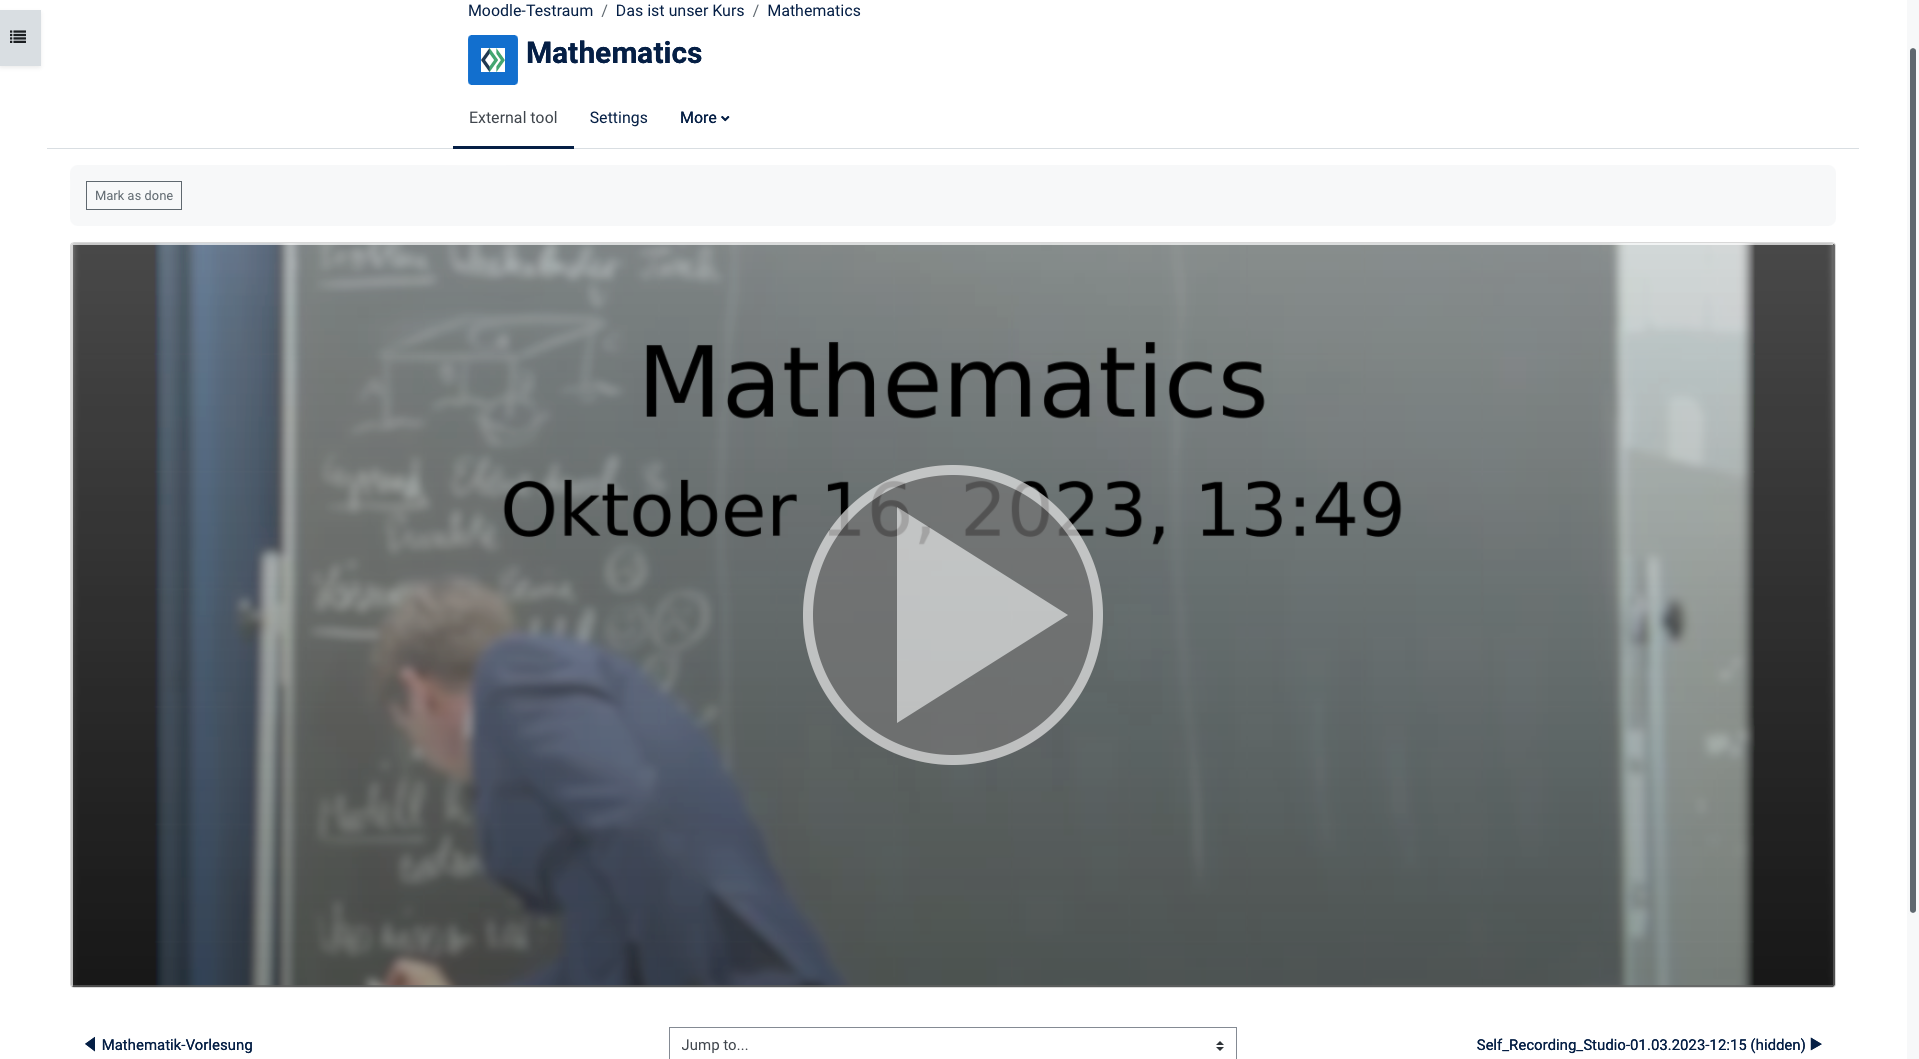
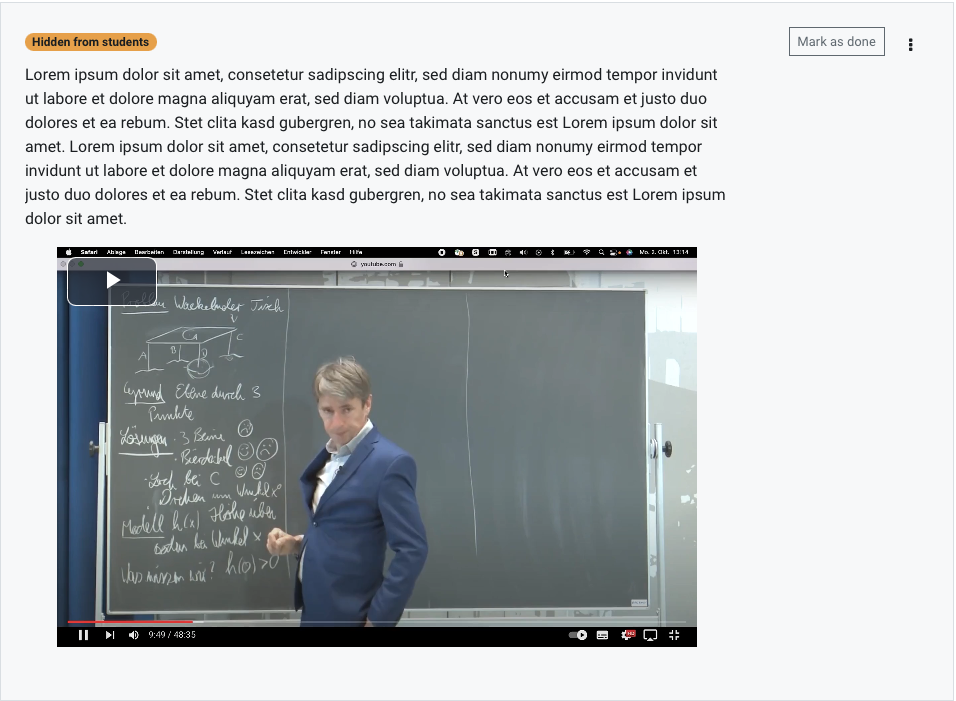
- The video will now appear as a link in your course. If you click on this, an external player will be opened to play the video.
Option 2 Embed a video in the text field
If you want to link to a video within a text section or description, use the activity Text field or Text page.
To do this, click Create activity or resource in the topic or course section, select the option Add text and media area or page.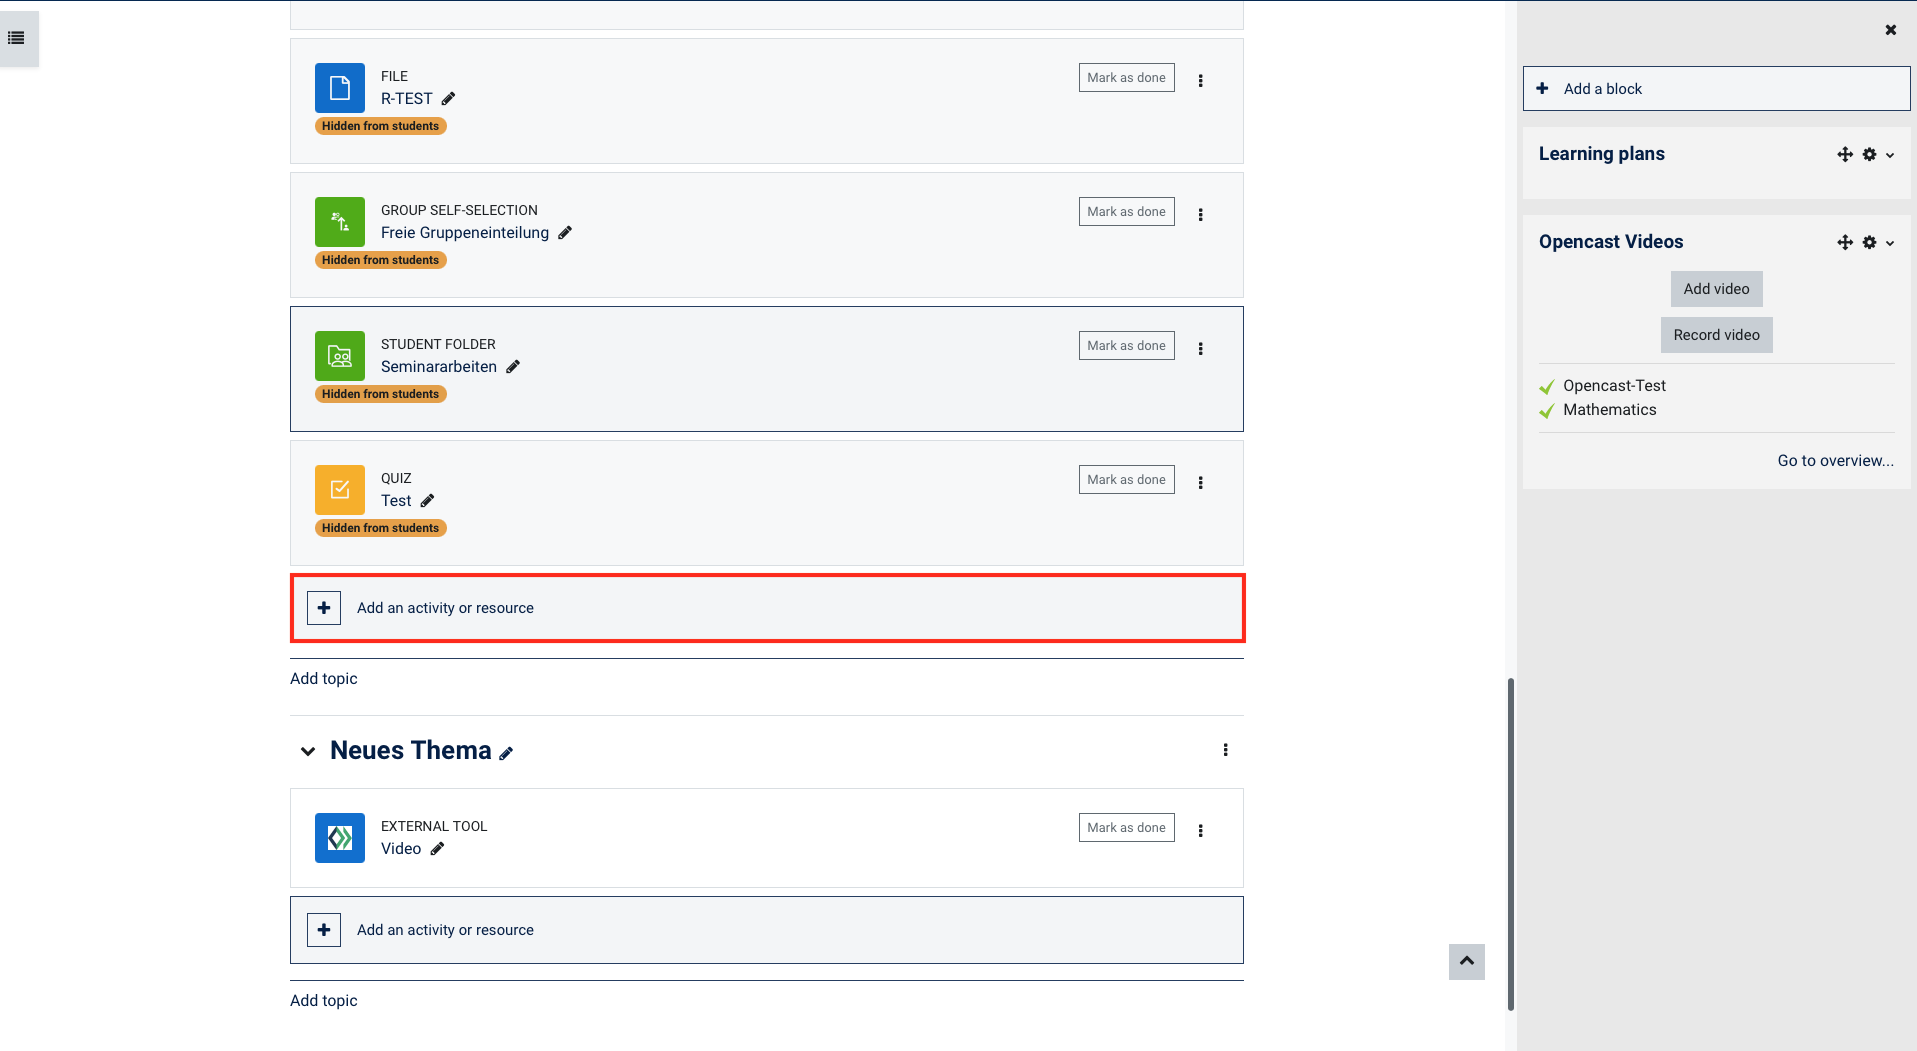
If you would like to make videos available to your participants at a later point in time, please change the visibility. Videos that are noted with a crossed-out eye will not be shown to the participants in the series overview.
In the following window you can edit the text field.
With a click on the button Multimedia you have the possibility to insert media in the text field.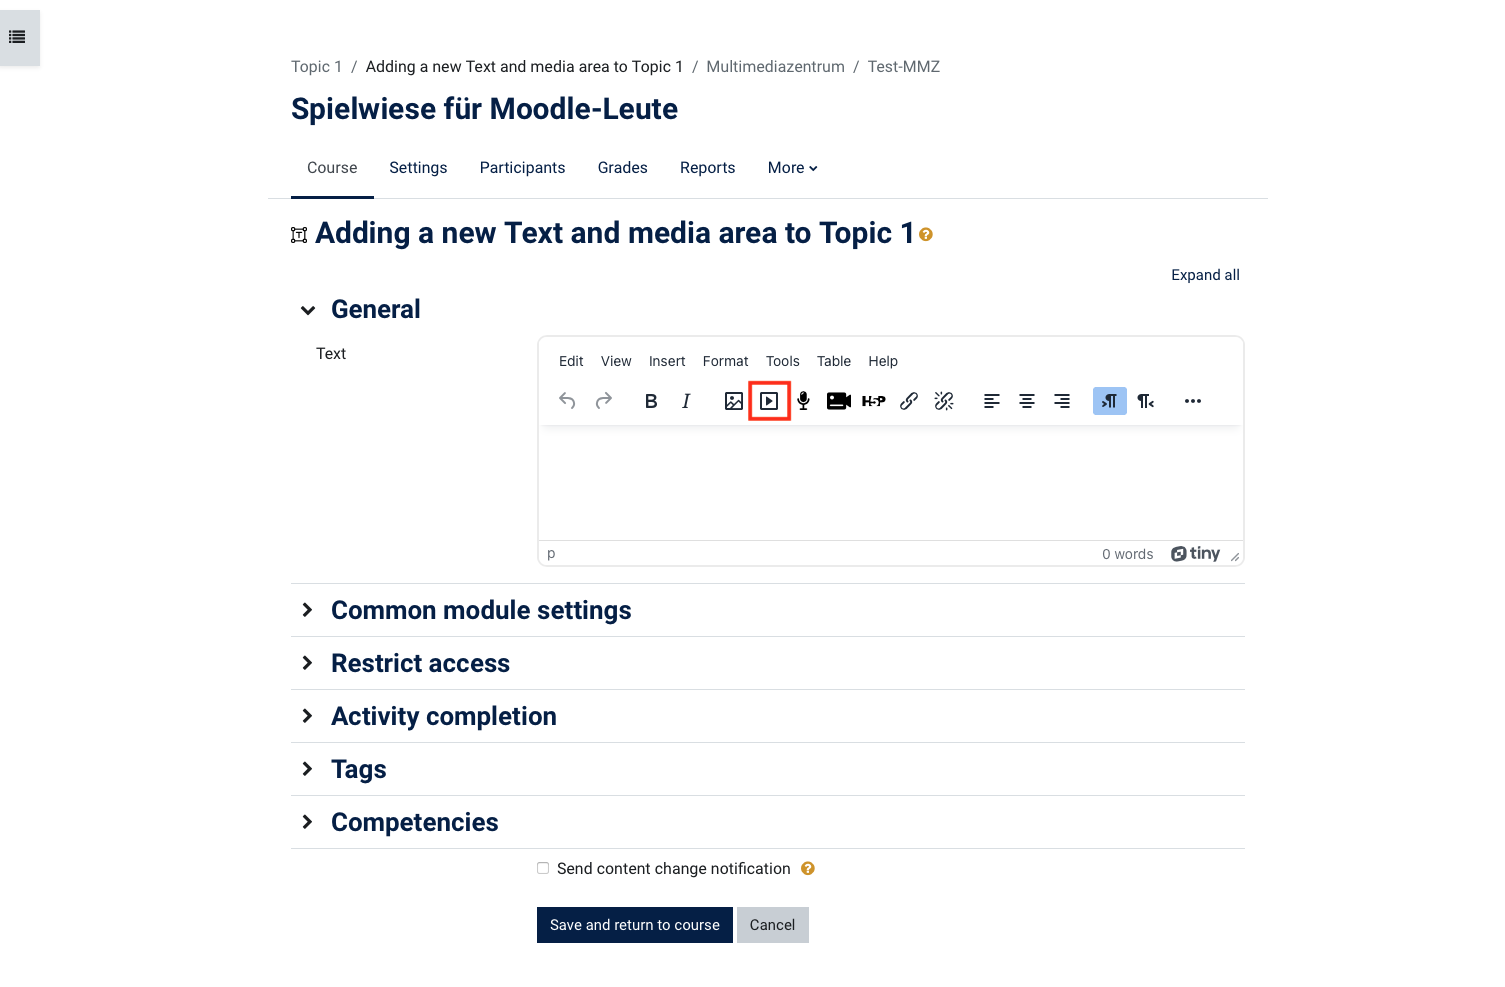
- Select a file and add it to the desired position in the text.
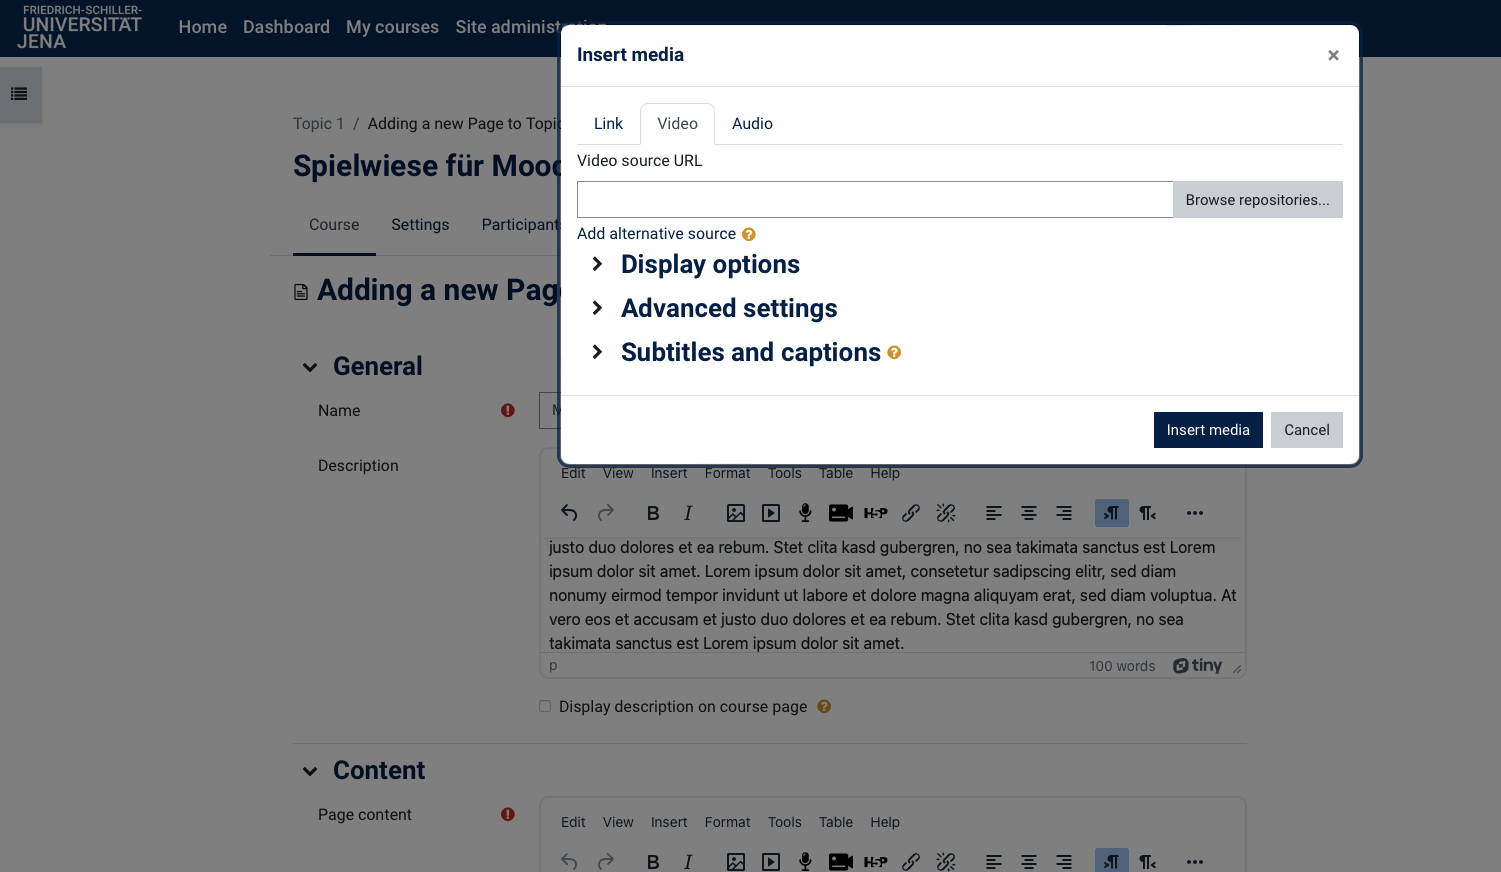
- The video is then embedded directly in the text and can be played.
Option 3 The Opencast Video activity
- Activate the editing mode of your course and click on Create activity or ressource in the content area.

2. In the window of available activities and materials, select the option Opencast Video.

3. On the page that opens, you can now enter a title, add a description and specify which video you want to include in the Opencast Episode dialogue.
If necessary, make further settings on this page and save.
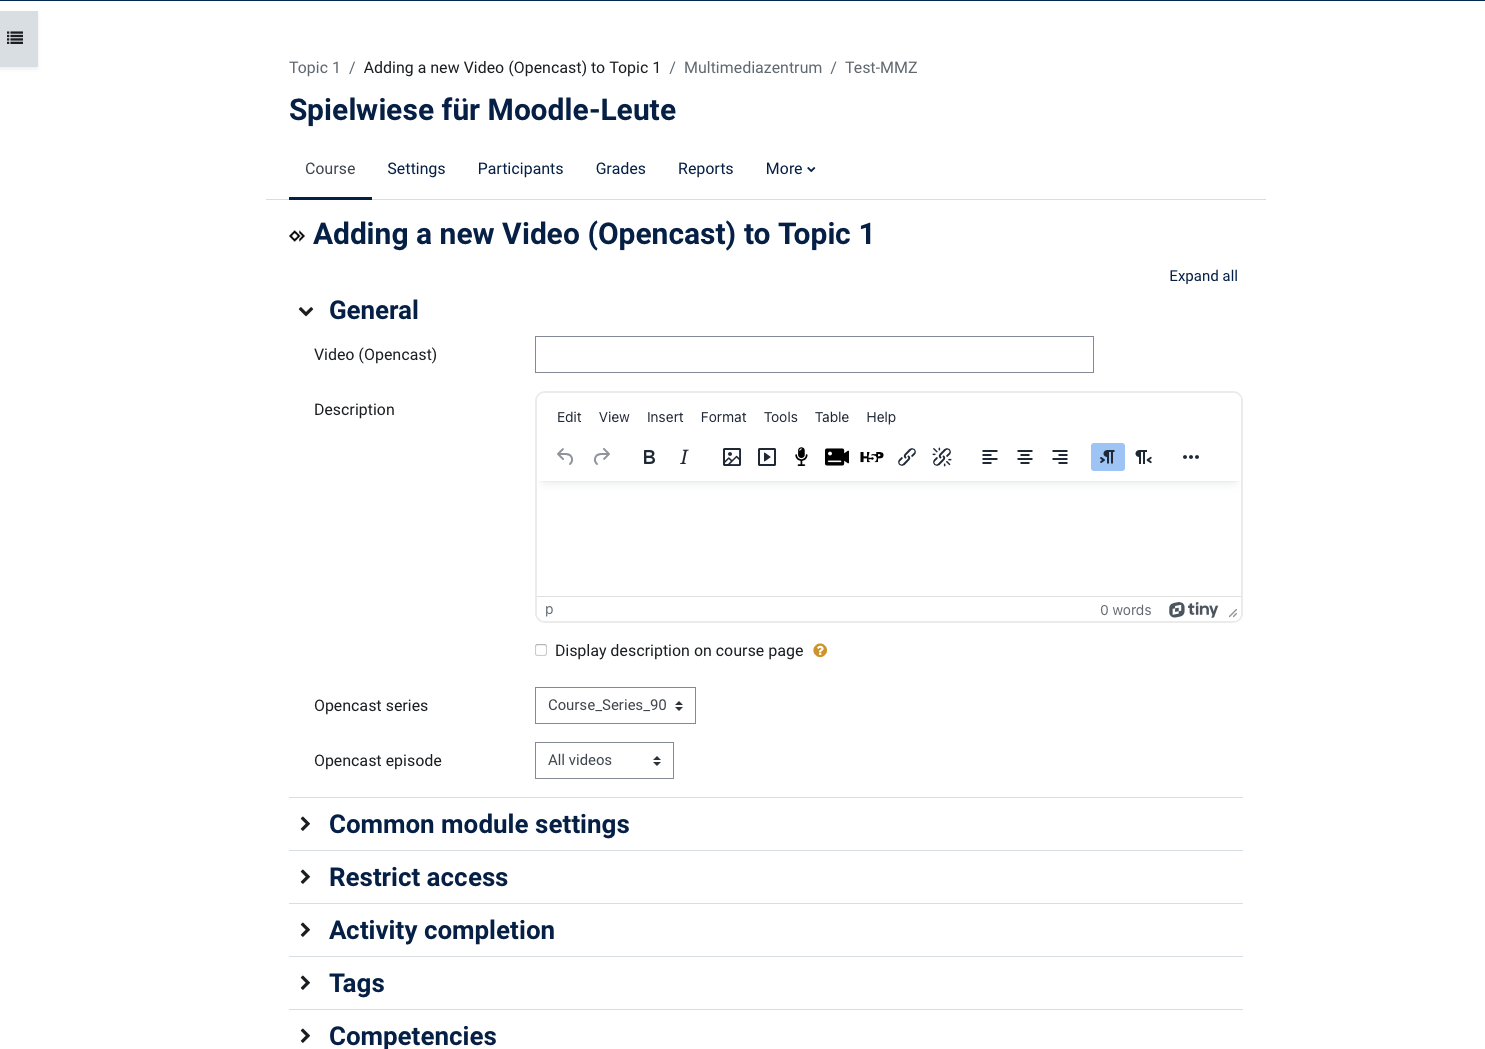
4. The selected video will now appear as an Opencast video activity in your course room.

Reuse videos from another course |
|---|
Import a series
| In the target course - i.e. in the course in which the videos are to appear - show the block Opencast Videos. Click on More videos... at the bottom right to go to the overview page of videos for the course. |
|
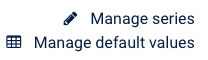
| On the overview page of the videos, you will find the Manage Series button at the top right. Please click on this button. |
|
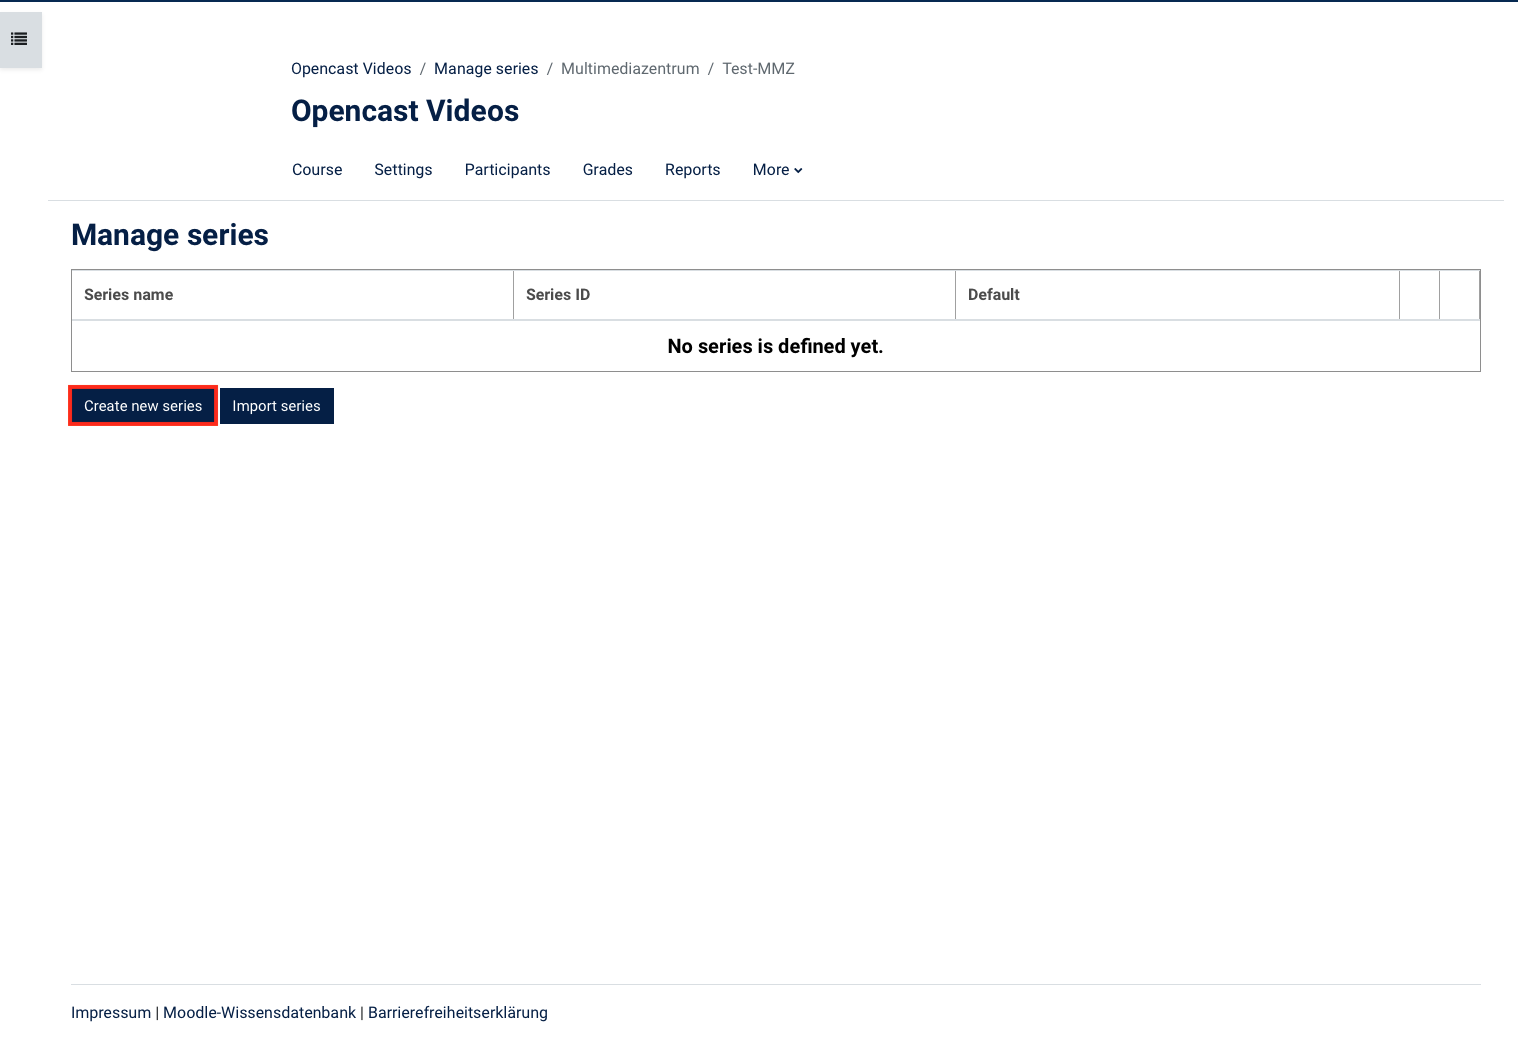
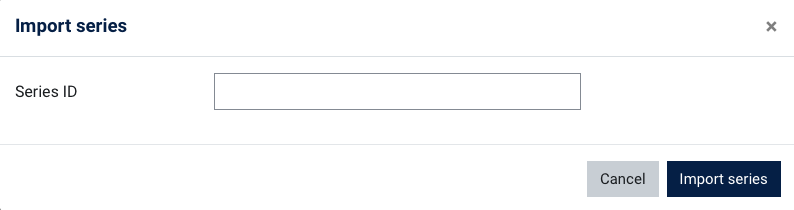
On the following page, click on Import Series. This is how you import a series from another Moodle course room. With this procedure, the videos are not duplicated and thus do not occupy any additional storage space. |
|
In the dialogue box that opens, enter the series ID. |
|
Then switch back to the video overview page - there you will find the imported series and can now integrate it as a whole or individual videos into your Moodle course room and make them available. Note that if you delete videos in one series, they will no longer be available in the other series. |

Import videos from another course
At the bottom of the overview of Opencast videos in your course you will find the section Import videos from another course. Use this section as follows:
| Add (if not already done) the block Opencast Videos, see above, to your course room. In this block, click on go to overview... |
|
| On the overview page of the videos, you will find the section Import videos from another course at the bottom of the page. Click Import Videos here. On the following page, select a source course (where the videos to be imported are located) - either from the list of suggestions or via the search. Then click Next. On the following page, you may need to confirm your search. Again, click Next and then, on the page after that, click Import videos and return to the overview. You will be taken to the overview page and the videos will be imported into the current course. |
|


How can I watch the recordings? |
|---|
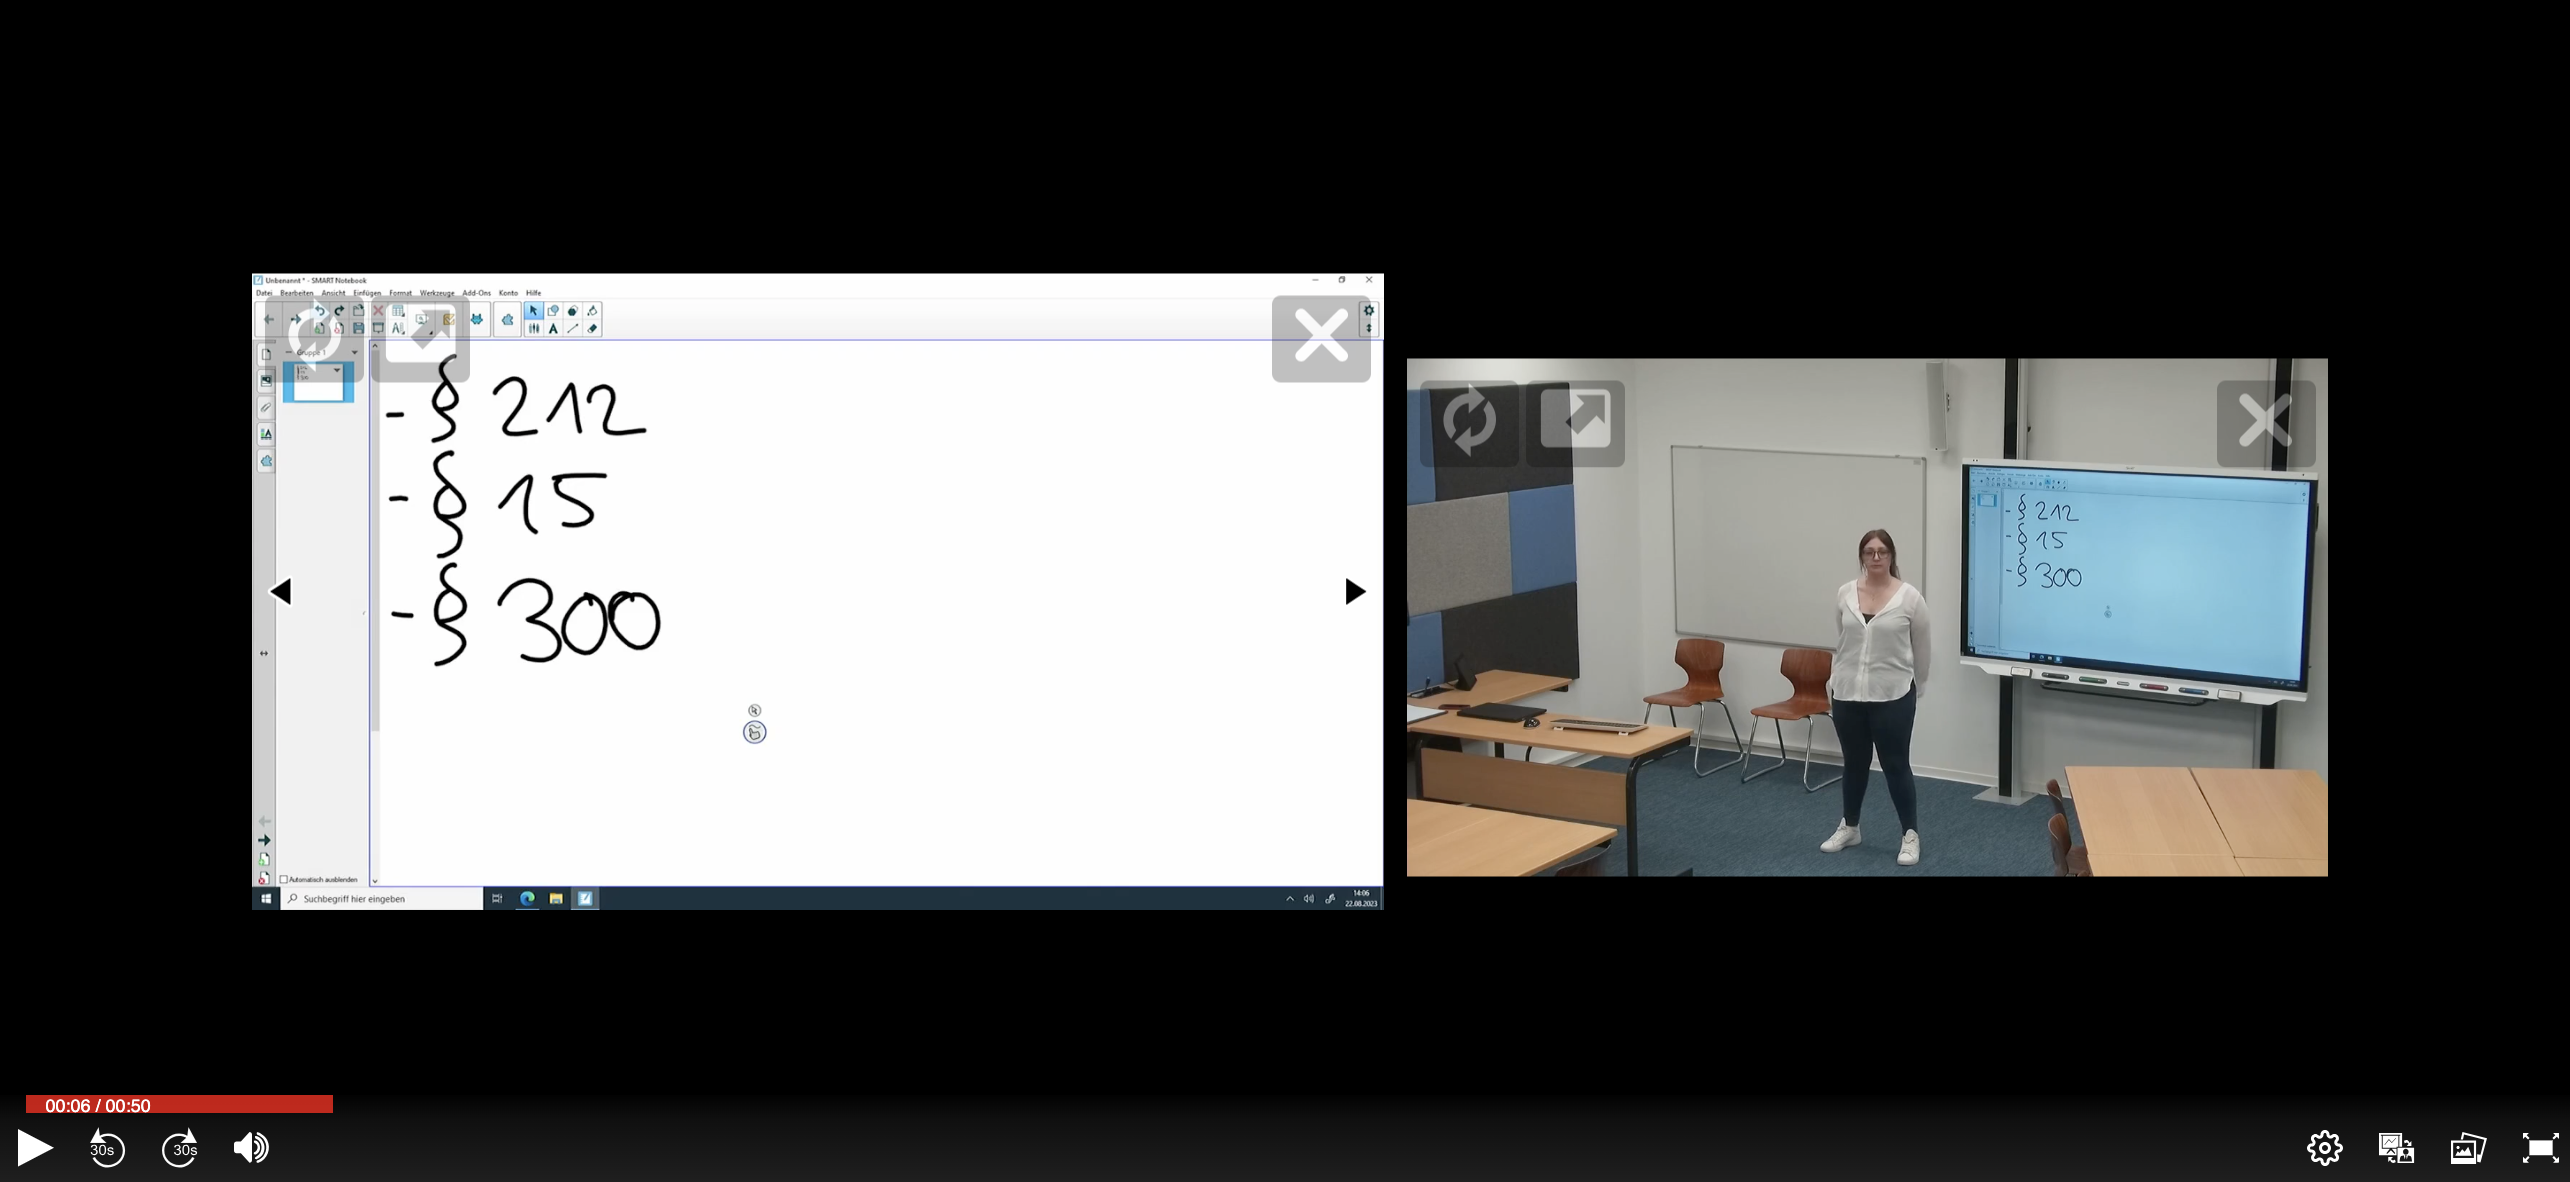
Player
Click at the video in your course to start playing it in a video player. |
|
The following control elements are available (from left to right):
|
|
Instructions for using Opencast Studio |
|---|
Opencast Studio is a special user interface that enables every registered user to record and publish recordings from the desktop and / or the camera image with sound directly from the web browser without additional software. An upload to the DBT is not necessary at this point.
The video created in this way can then be edited (trimmed and pauses) directly in the browser without editing software and published in various layouts.
In Moodle, open your course, add the block (if not already there) Opencast Videos (see above for instructions) and click Record Video.
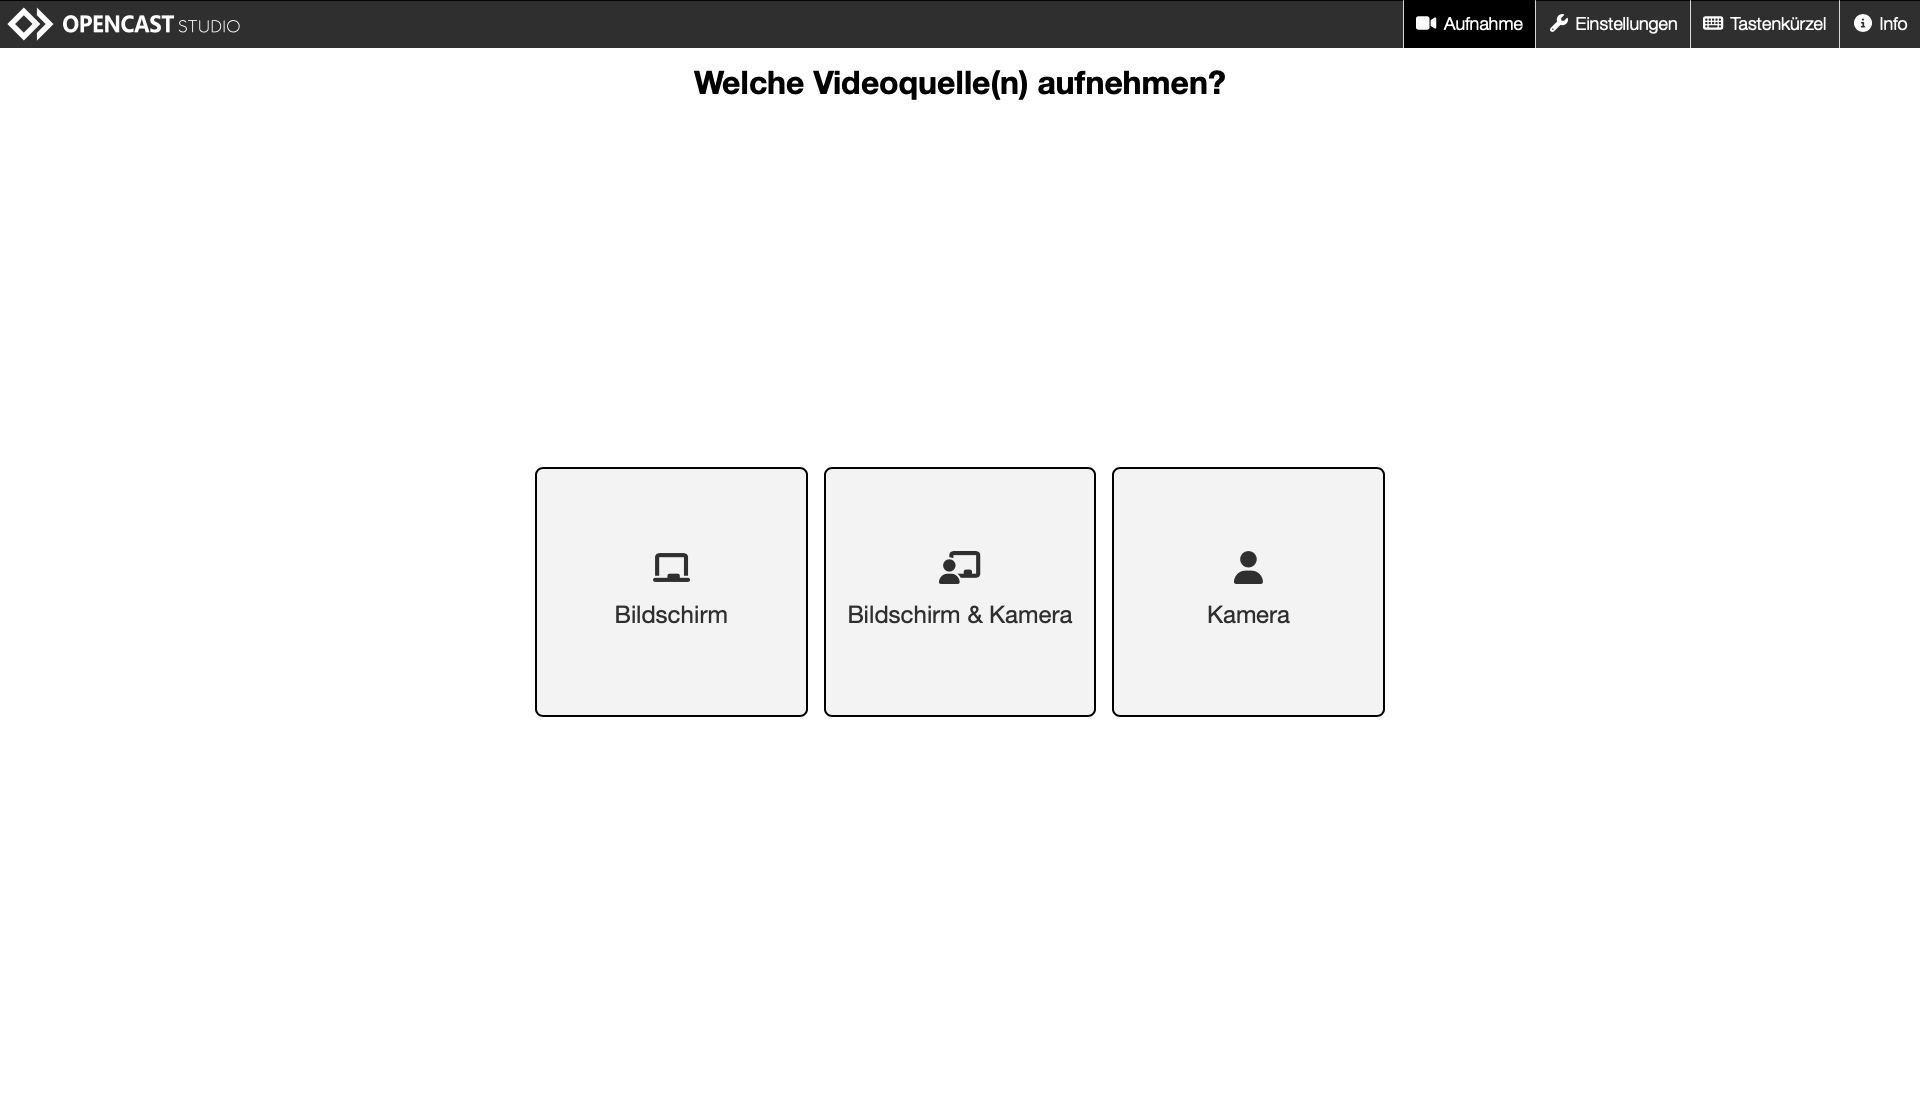
Opencast Studio will open and you will see this initial screen. Here you select which video source you want to record.
For example, click on Screen to record the display of your screen.
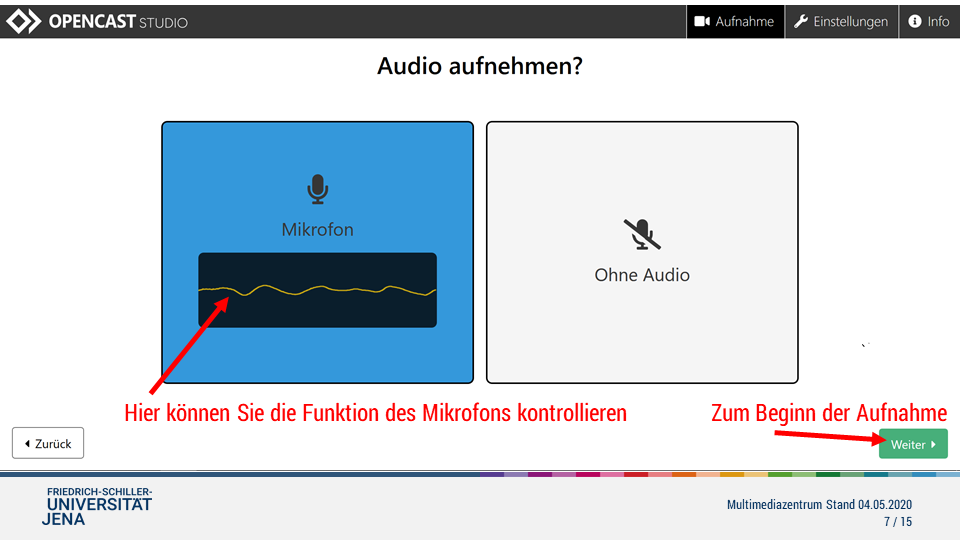
Select the microphone and check the function
- After you have set the image source, confirm the selection of the microphone in the next step - if one is to be used.
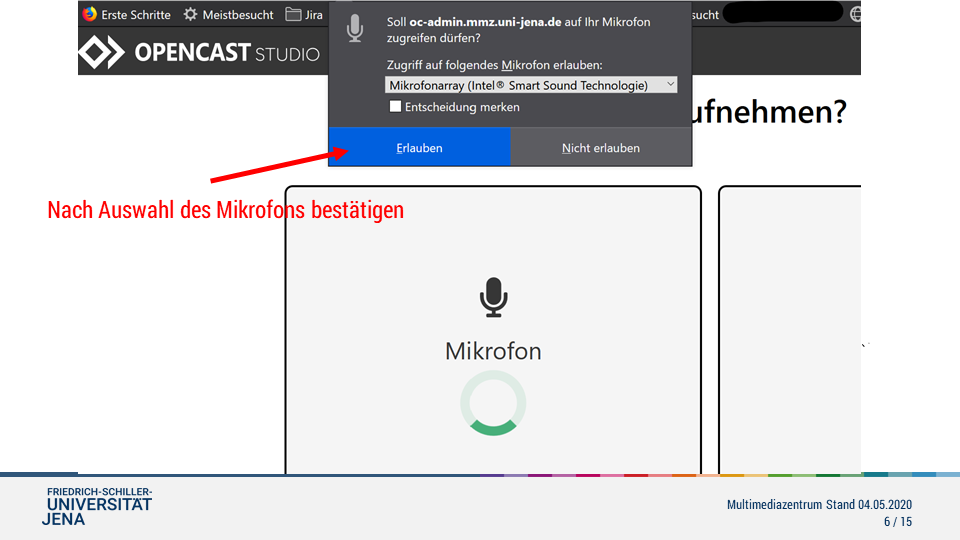
- Perform a brief functional test to ensure that audio recording is working with the selected microphone. Then click next at the bottom right to start the recording in the next step.
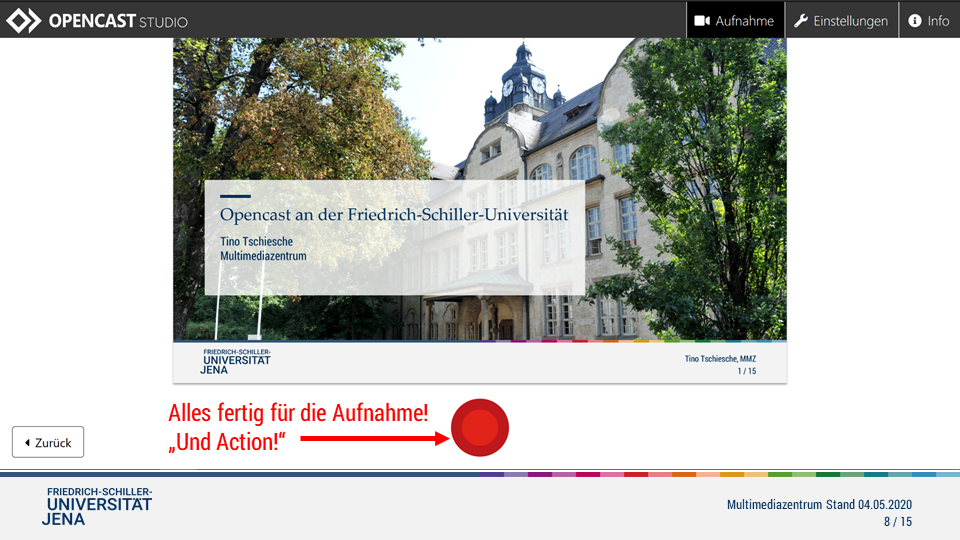
The recording
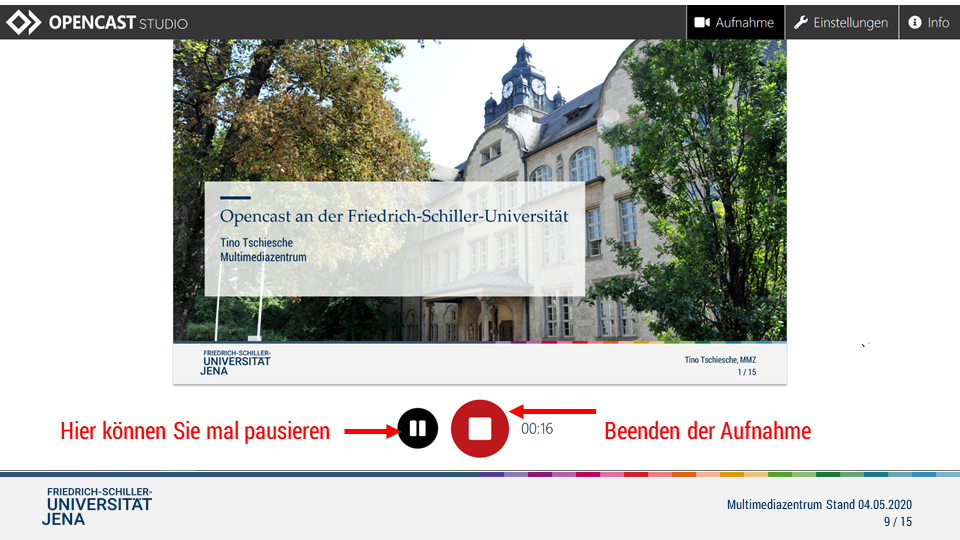
- On the following page you can see the selected image source. Now click on the red record button below the picture to start recording.
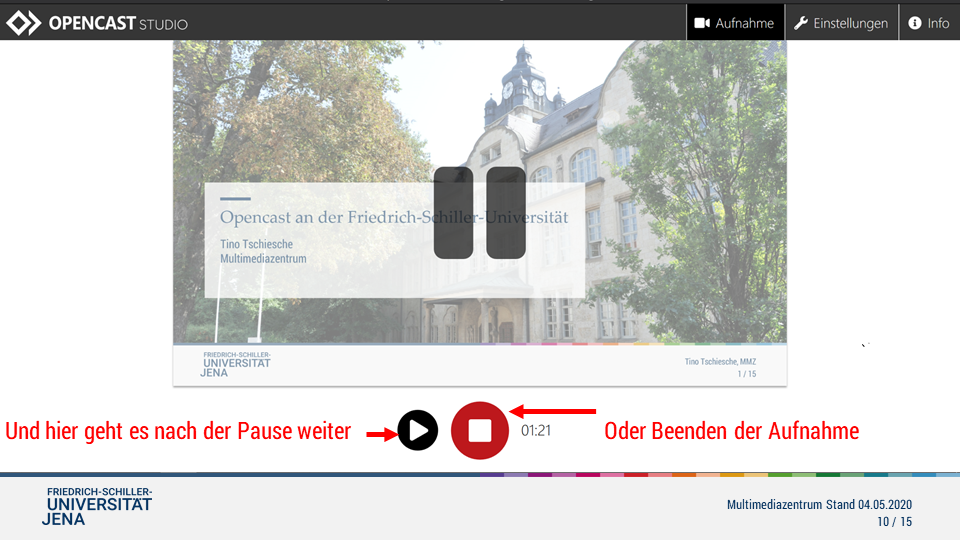
As soon as the recording is running, two new buttons appear below the image: pause / play (left) and end recording (right).
You can pause the recording at any time. To do this, click the pause button. To resume recording, click the pause button (which is now a play button) again.
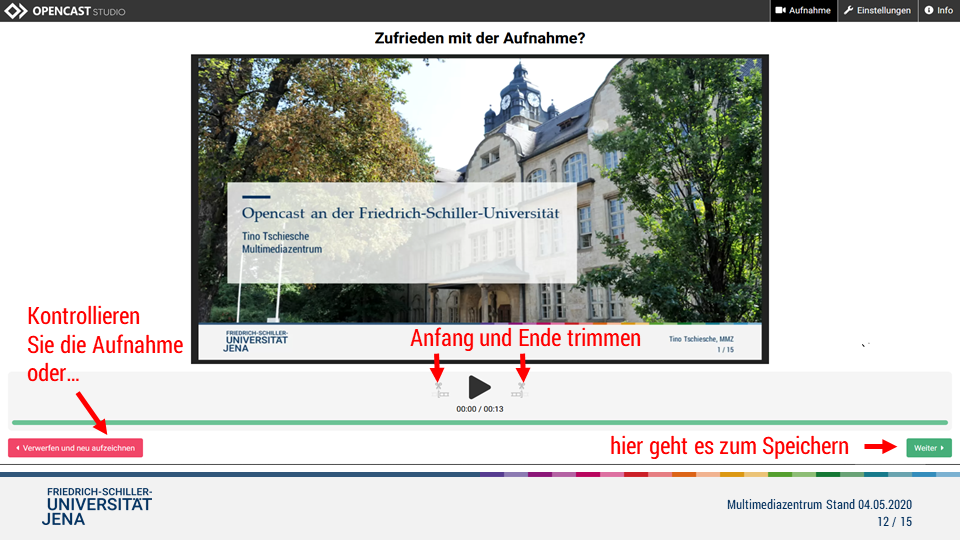
Checking the recording
After clicking stop recording, you can:
- check the recording: To do this, click the playback button in the video window
- trim the beginning and the end
- discard the recording and record again
- save the recording: To do this, click next at the bottom right
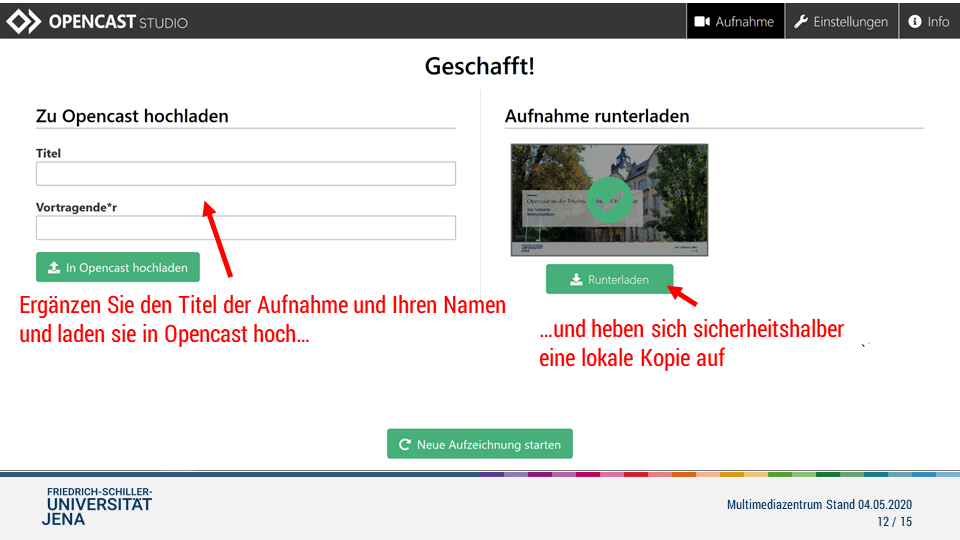
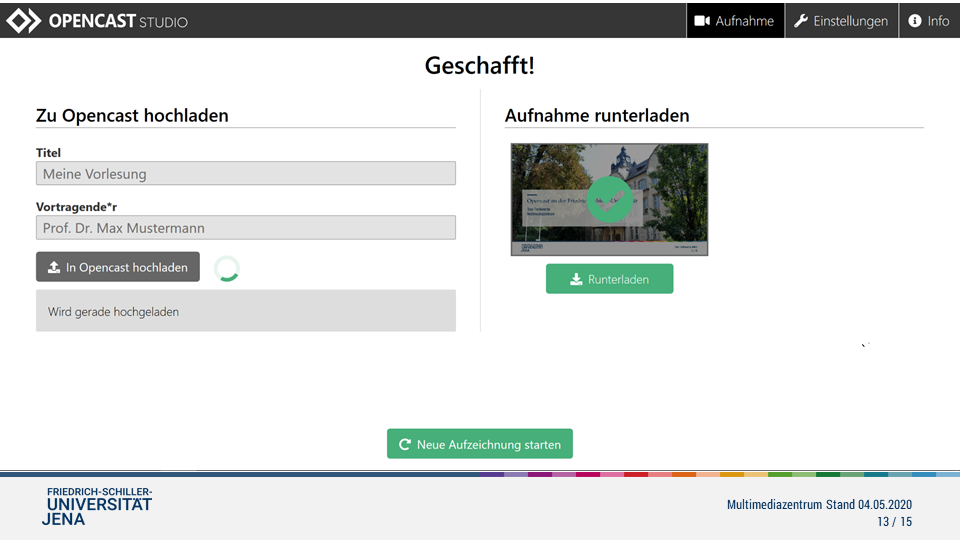
If you clicked next to save the video, this screen will appear. Please carry out the following steps here:
- Save a local copy of your recording. In the download recording section, click the download button.
- Upload the video to Opencast. Assign a video title, add the lecturer and upload the video to Opencast by clicking on the green button on the left in the picture.
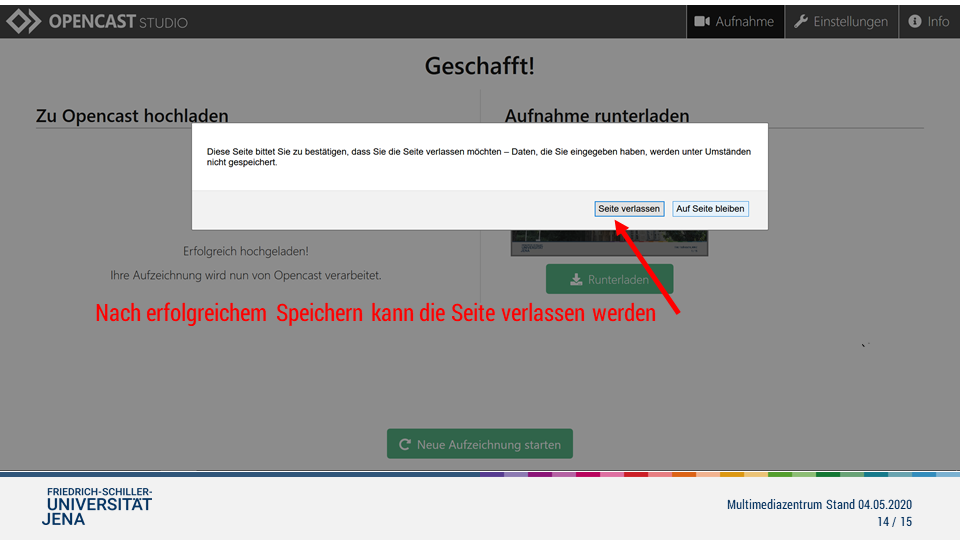
Exit Opencast Studio
Done. You can now exit Opencast Studio. To do this, click on leave page in the dialog that opens.
I want to download my videos (for editing).
If you, as a teacher, want to download a video (e.g. to edit it externally), follow these steps:
Add a new section in your Moodle course room und hide this via the dialogmenue on the right.

Add the activity External Tool.
- Enter a name.
- Choose the option Opencast series.
- Add under Show more… the following
series=<ID>
download=true 
Find the series ID
Open the Opencast videos overview and click on Edit series, to show the ID.


If you did everything correctly, the result will look something like this:

Click on the icon on the right to download a video - different resolutions are available for you.
Title: "Videos in moodle"
Date: 01.11.2024