Versionen im Vergleich

Schlüssel

  • Diese Zeile wurde hinzugefügt.
  • Diese Zeile wurde entfernt.
  • Formatierung wurde geändert.

...

Englisch
Panel
borderColor#d0d1d4
borderStylesolid

Summary

Establish a VPN connection to the intranet of the University of Jena using the built in VPN funcionalities of a Debian based Linux.


Panel
borderColor#d0d1d4
borderStylesolid

This guide is aimed at the following target groups:

  • Students
  • Teachers
  • Employees
  • Scientific employees and assistants
  • Institutions and Commitees (e.g. student councils)
  • Working groups (e.g. projects)
  • Guests of the University of Jena

Requirements

  • an activated user account of the University of Jena
  • a recent Debian based Linux OS
  • administrator privileges (sudo)
  • internet connection

For further information and requirements for VPN service look at VPN - Zugang zum internen Universitätsnetz (uni-jena.de).


Installation and the use of the VPN service

1. Step: Install the VPN components

Open the terminal and type/copy the following commands to load the latest packages with their dependencies (run commands line by line):

sudo apt-get update
sudo apt-get upgrade

Then additional components of the OpenConnect SSL client must be installed. These are required for the connection to the VPN gateway of the University of Jena.


sudo apt-get install openconnect network-manager-openconnect network-manager-openconnect-gnome

Confirm the installation of the new components.

Then install the security certificate (execute line by line):

sudo -i
cd /etc/ssl/certs
wget https://www.pki.dfn.de/fileadmin/PKI/zertifikate/T-TeleSec_GlobalRoot_Class_2.pem

Hinweis
titleWaiting for Update to next Ubuntu version (Debian)


Currently a necessary option is missing in the graphical user interface under Debian (Ubuntu, Mint, etc).

The required version of nework-manager-openconnect is 1.2.10.

Therefore, use Cisco AnyConnect or run OpenConnect via command line with the parameters:

sudo openconnect -b --useragent 'AnyConnect' --user=ab12cde@uni-jena.de --pid-file=/var/run/vpn.pid --timestamp --syslog vpn.uni-jena.de

Attention. "ab12cde" must be replaced with your login name!

The most reliable way to terminate the VPN is to restart the system.

Erweitern
titlecurrently not valid

2. Step: Configure the VPN profile using the native network manager


(click to enlarge the picture)

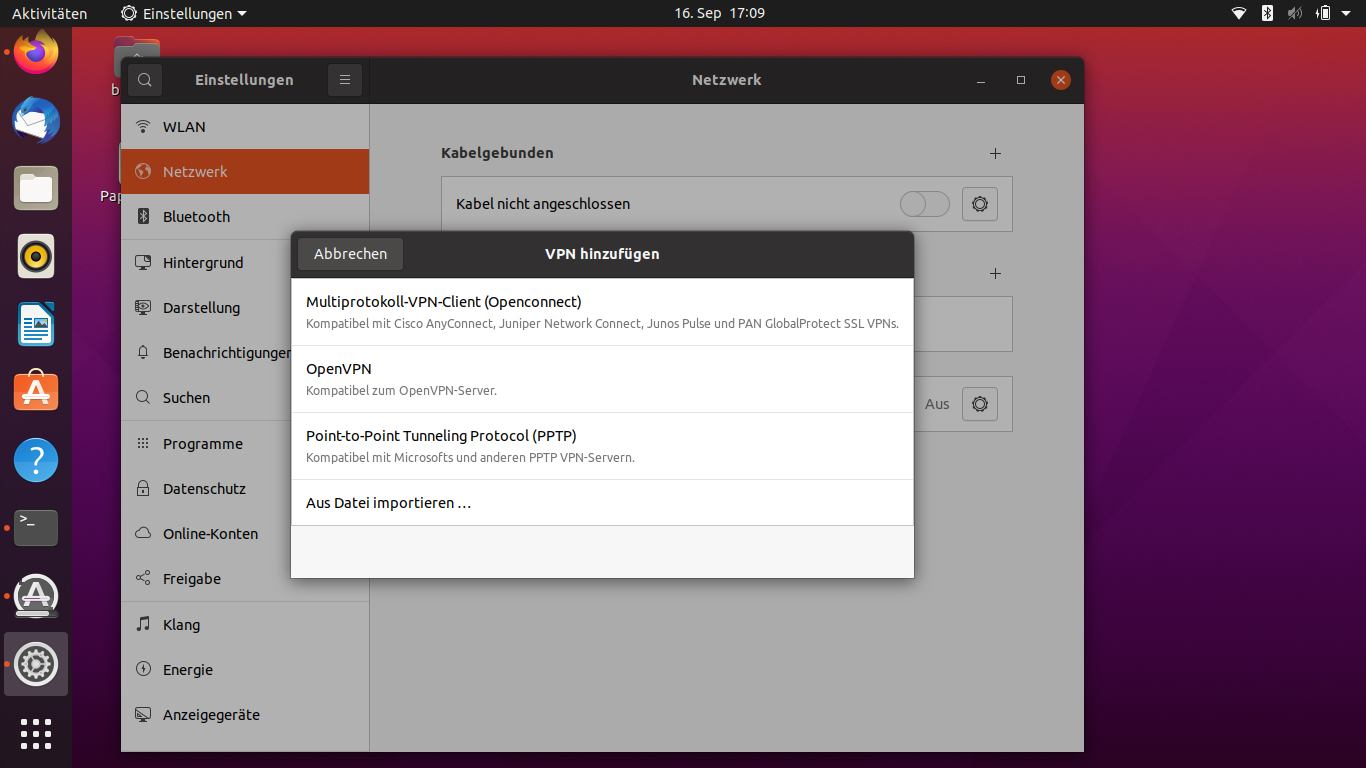
In the Settings (for Ubuntu) you will find a menu item "Network" on the left, here you will find the "VPN" section. New connections can be set up by clicking on the "+" button.

Now select the item "Multiprotocol VPN Client (OpenConnect)", which was added by installing OpenConnect.

(click to enlarge the picture)

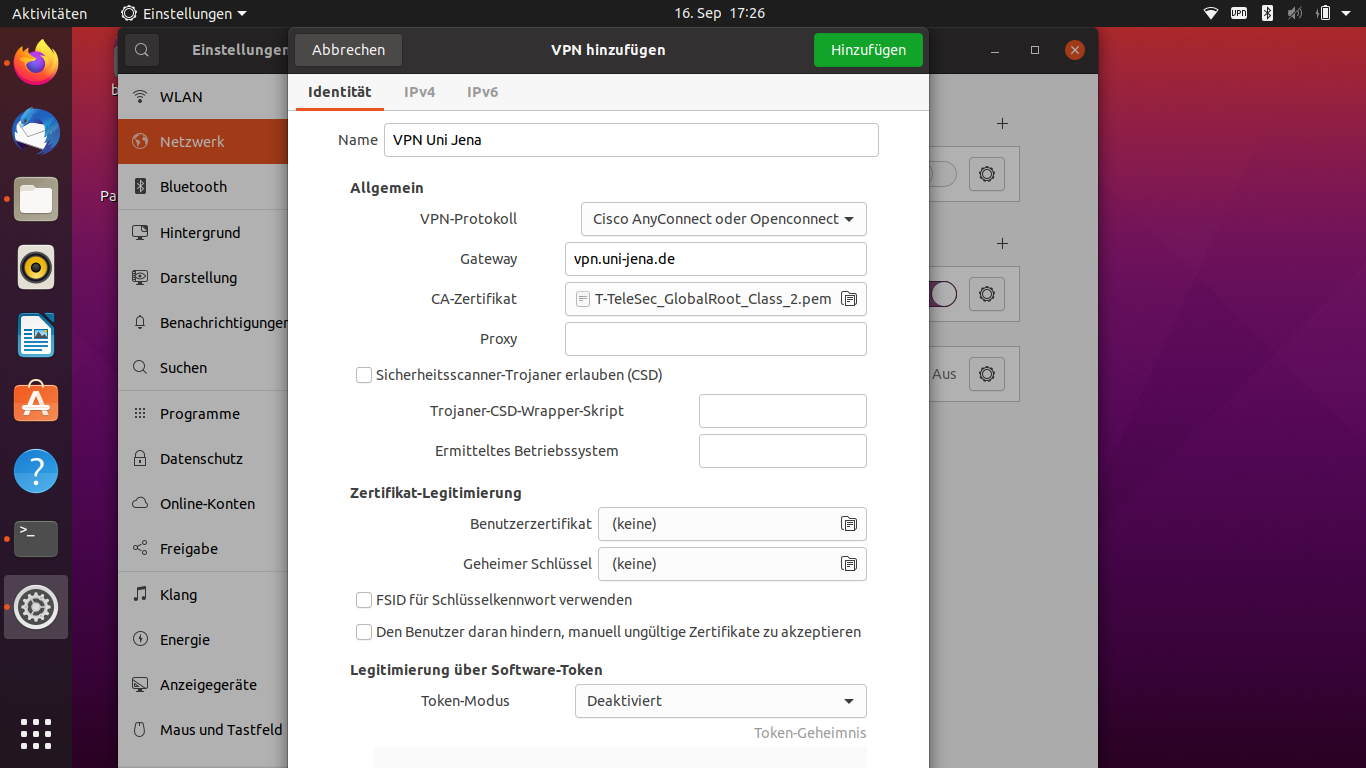
Afterwards, a name can be assigned for this VPN profile. Furthermore, the settings should be look like this:

  • VPN Protocol: Cisco AnyConnect oder OpenConnect
  • Gateway: vpn.uni-jena.de
  • CA Certificate: /etc/ssl/certs/T-TeleSec_GlobalRoot_Class_2.pem

If thecertificate cannot be foundin this storage location, it must be installed additionally by using the terminal. The commands for the installation are:

sudo -i
cd /etc/ssl/certs
wget https://www.pki.dfn.de/fileadmin/PKI/zertifikate/T-TeleSec_GlobalRoot_Class_2.pem

(Execute commands line by line)


(click to enlarge the picture)

You can access the root directory "/"(comparable to hard disk C:\ on Windows) via the hard disk icon, which you can make visible via the small arrow to the left of the name of your user profile.

The new VPN profile is saved by clicking on the "Add" button.

3. Step: Establish a VPN connection using the profile that has been set up

(click to enlarge the picture)

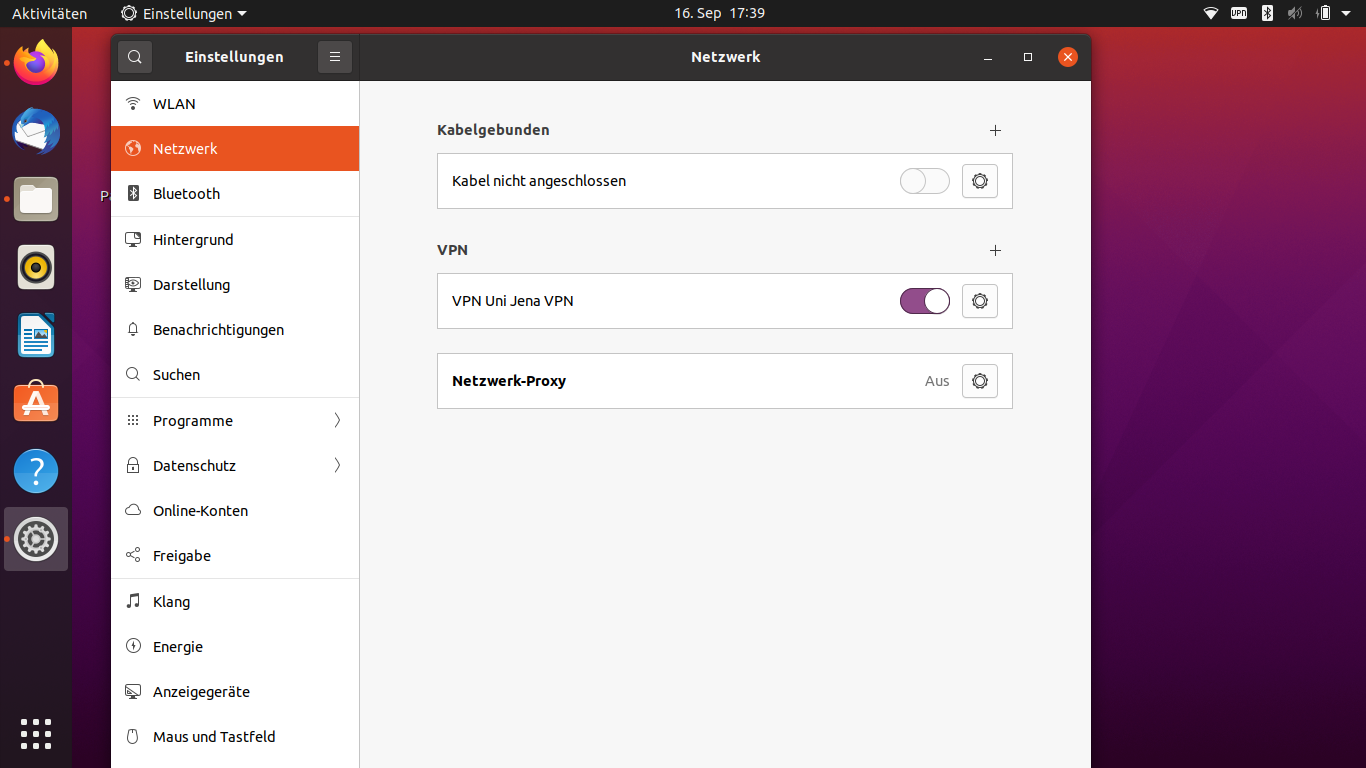
The profile recently setted up is displayed in the tab "Network" in "Settings". The VPN connection can there be established via the switch. 
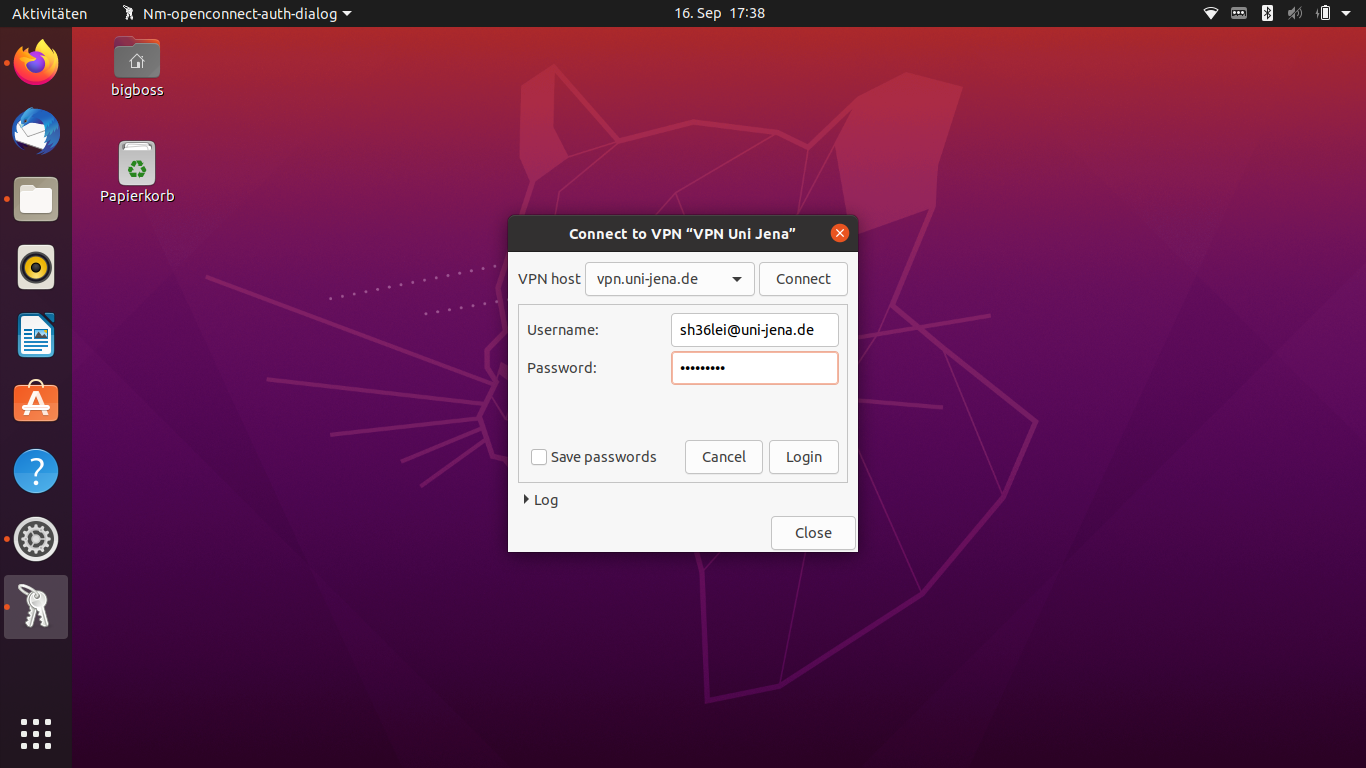

(click to enlarge the picture)

Now you have configured the dial-in point of the University of Jena and the system asks for your username.

Enter your URZ loginabbreviation and add "@uni-jena.de" directly. Without this addition, dialling into the VPN will not be possible. 

  • Username for example: sh36lei@uni-jena.de
  • Password: password

After entering the associated password, you can set up the VPN connection using the [Login] button. 

4. (optional) VPN connection quick access -disconnect /connect


(click to enlarge the picture)

The current VPN profile can be quickly reached using the small arrow at the top right and can be switched on and off here.


Info

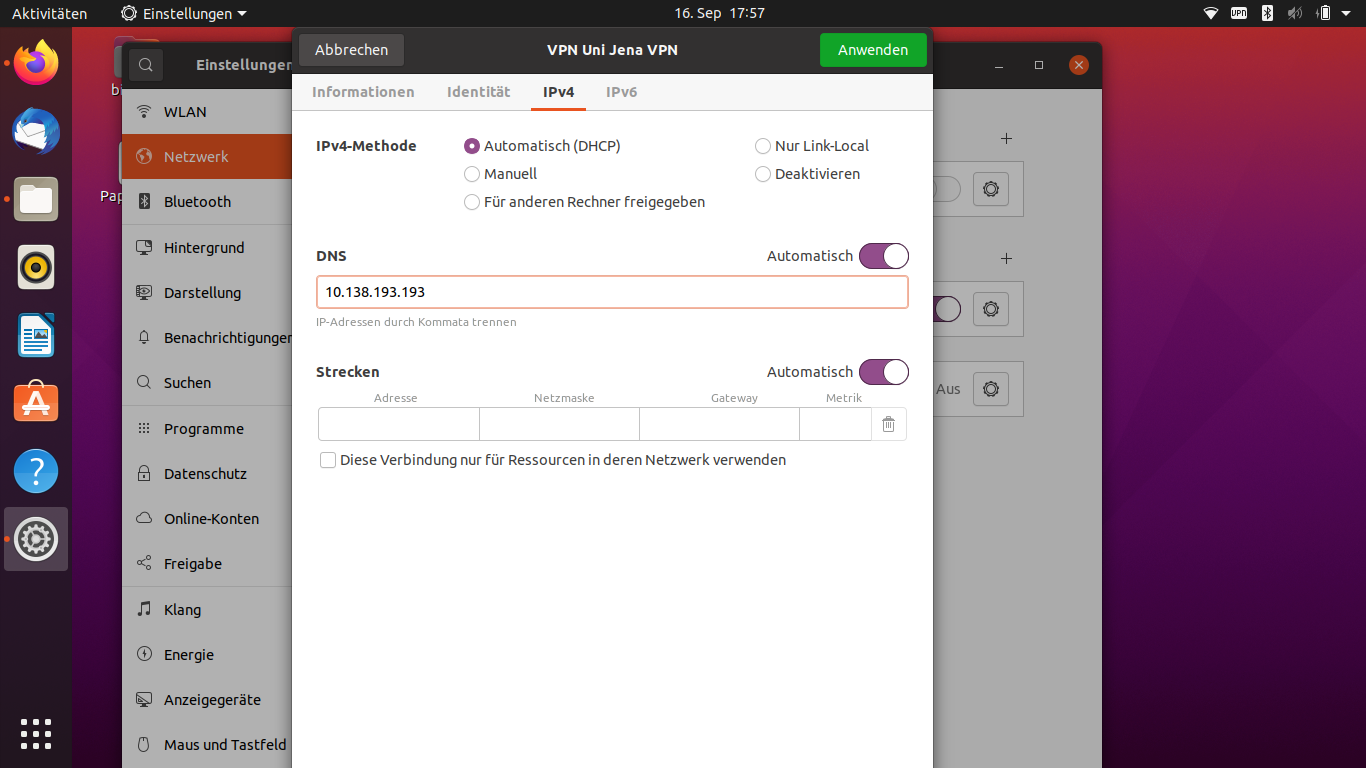
DNS problems with the "openconnect plugin" can occur. Unfortunately, the Uni-DNS servers, which are correctly transmitted to the openconnect client using the "X-CSTP-DNS: 10.138.193.193" header, are not transferred to the own system. The problem occurs with Archlinux with the NetworkManger plug-in and also the CLI version of openconnect. Ubuntu 20.04 shows the same problem with the NM-openconnect. This means that university-internal servers cannot be resolved and thus cannot be reached.

A possible workaround is to manually enter the Uni-DNS server in the IPv4 tab of the connection settings of the VPN profile in the section "DNS Server". Then these are written over in the system while connecting and access to the university-internal servers is possible via VPN. 


(click to enlarge the picture)

Panel
borderColor#d0d1d4
borderStylesolid

Title: "Ubuntu 20.04 LTS (Linux) - installing VPN (OpenConnect)"

Edited: 29.02.2024