| HideElements | ||||||
|---|---|---|---|---|---|---|
|
| Info | |||||||
|---|---|---|---|---|---|---|---|
| Deutsch | |||||||
Zusammenfassung
| |||||||
| Panel | |||||||
| |||||||
Diese Anleitung richtet sich besonders an folgende Zielgruppen:
Voraussetzungen
Unter VPN - Zugang zum internen Universitätsnetz (uni-jena.de) finden Sie weitere Informationen zu Voraussetzungen und Leistungsumfang des VPN-Services. Installation und Nutzung des VPN-Dienstes1. Schritt: VPN-Software installierenInstallieren Sie den "Cisco AnyConnect Secure Mobility Client", welchen Sie auf folgender Seite VPN-Verbindung für Windows, Apple, Linux und Mobil (uni-jena.de) finden. Melden Sie sich dazu mit Ihrem Login des URZ (Universitätsrechenzentrum) an. Für Windows-Betriebssysteme laden Sie bitte die Datei " |
...
cisco-secure-client-win-X.X.X. |
...
XX-core-vpn-predeploy-k9.msi" herunter. Mit einem Doppelklick auf die heruntergeladene Datei gelangen Sie zum Installations-Dialog, welchen Sie bitte bis zum Ende abschließen.
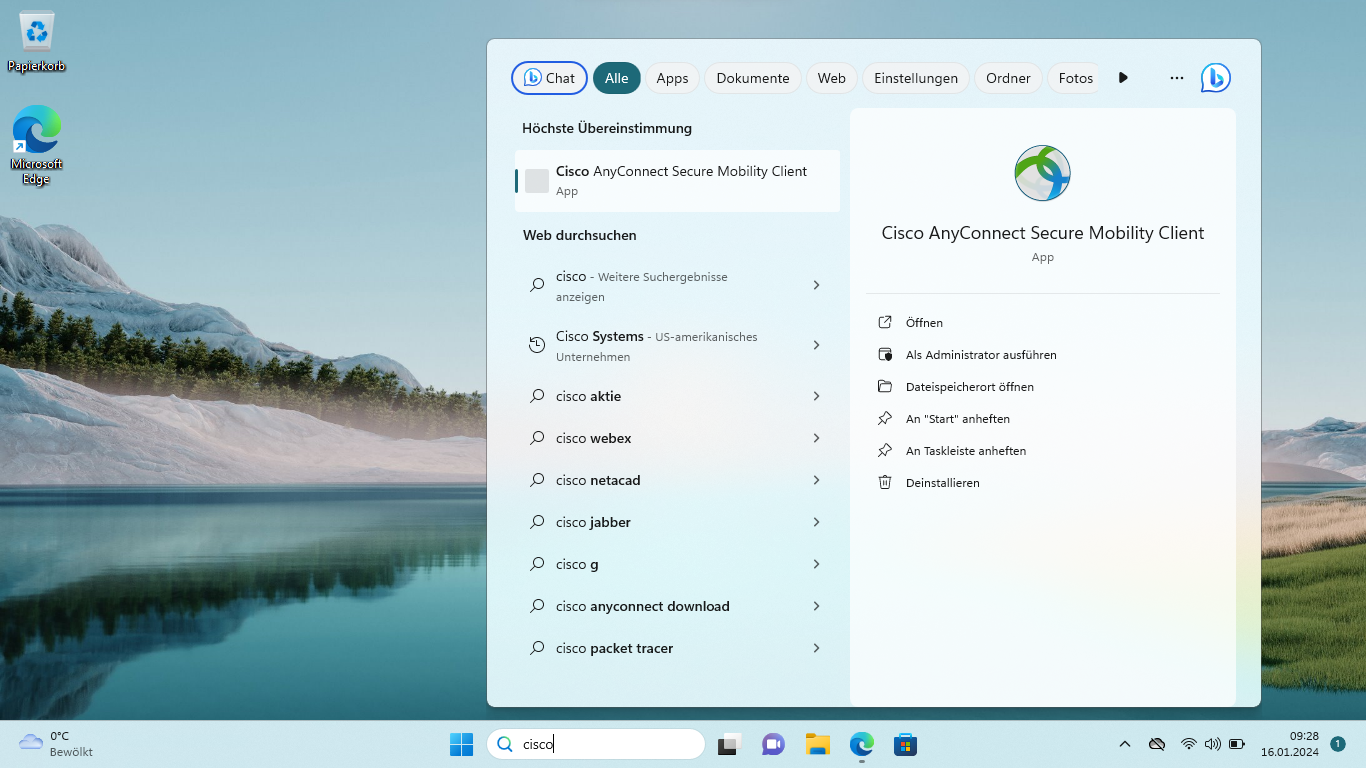
2. Schritt: Verbindung zum Universitätsnetzwerk herstellenNach erfolgreicher Installation des VPN-Clients suchen Sie im Startmenü den "Cisco AnyConnect Secure Mobility Client" und starten diesen mit einem Linksklick. |
...
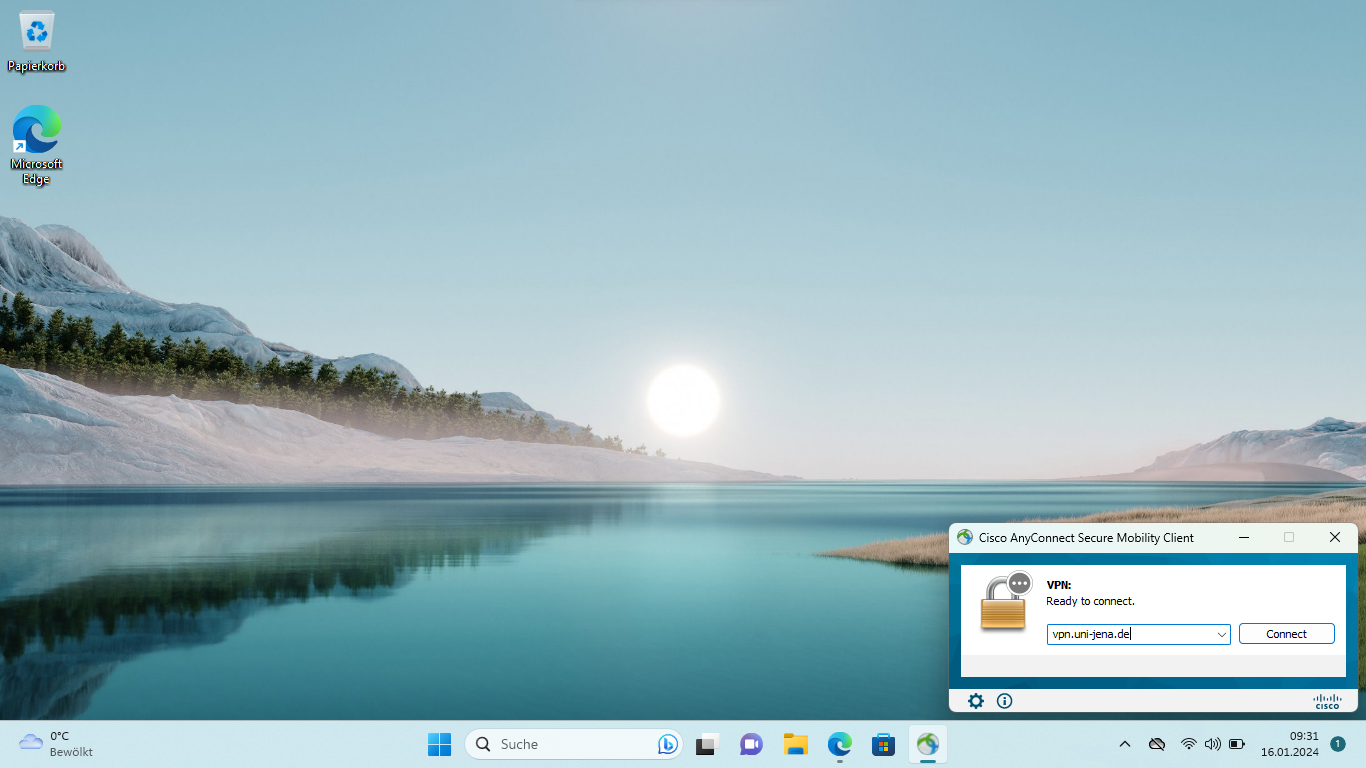
Tragen Sie in das nun erscheinende Feld "vpn.uni-jena.de" ein und linksklicken Sie die Taste [Connect]. |
...
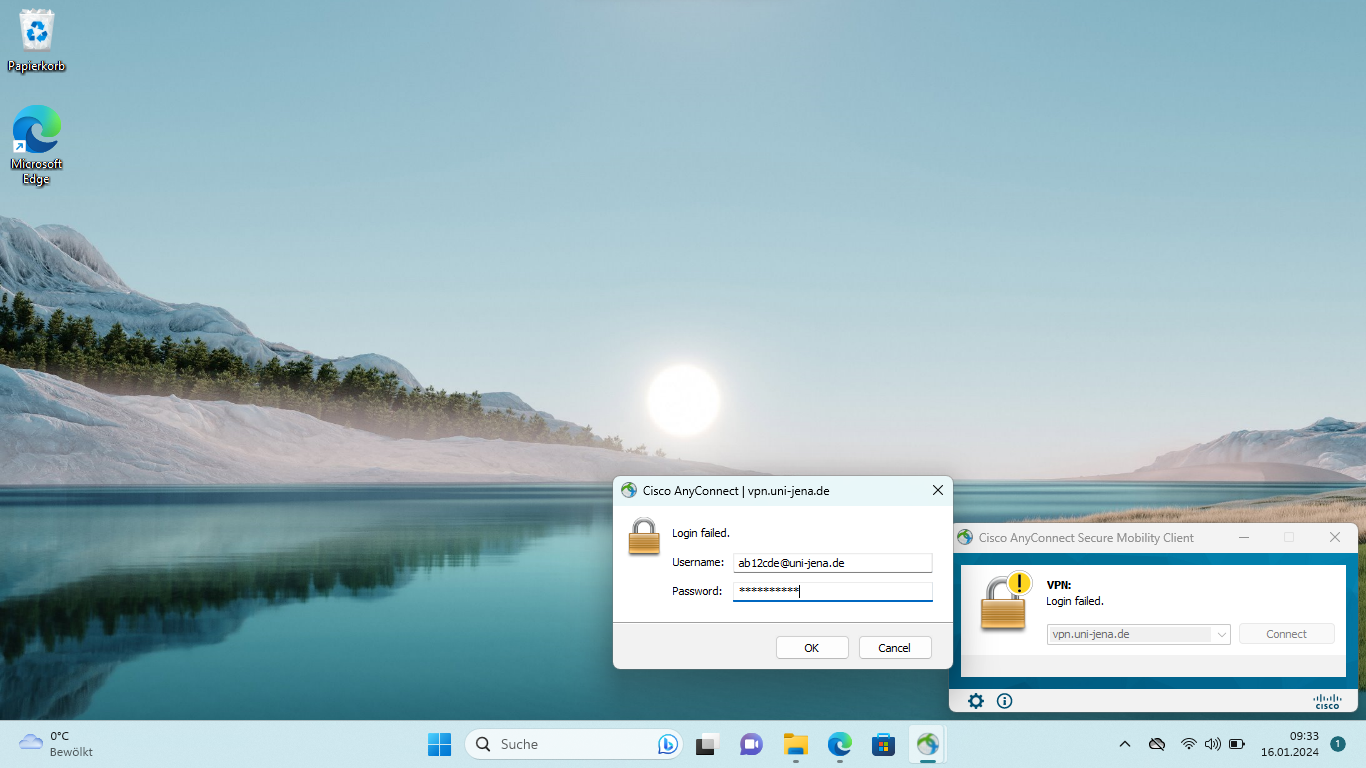
Nachdem Sie den Einwahlpunkt der Universität Jena konfiguriert haben, fragt Ciso AnyConnect nach Ihrem Benutzernamen. Hier geben Sie Ihr Loginkürzel des URZ und fügen "@uni-jena.de" direkt an (bspw. ab12cde@uni-jena.de) nicht Ihre E-Mail-Adresse). Ohne diesen Zusatz wird die Einwahl in das VPN nicht möglich sein. Nach Eingabe des dazugehörigen Passwortes können Sie über die Schaltfläche [OK] den VPN-Tunnel aufbauen. Aus Sicherheitsgründen können die Anmeldedaten nicht gespeichert werden und müssen vor jedem erneuten Verbindungsaufbau eingegeben werden. |
...
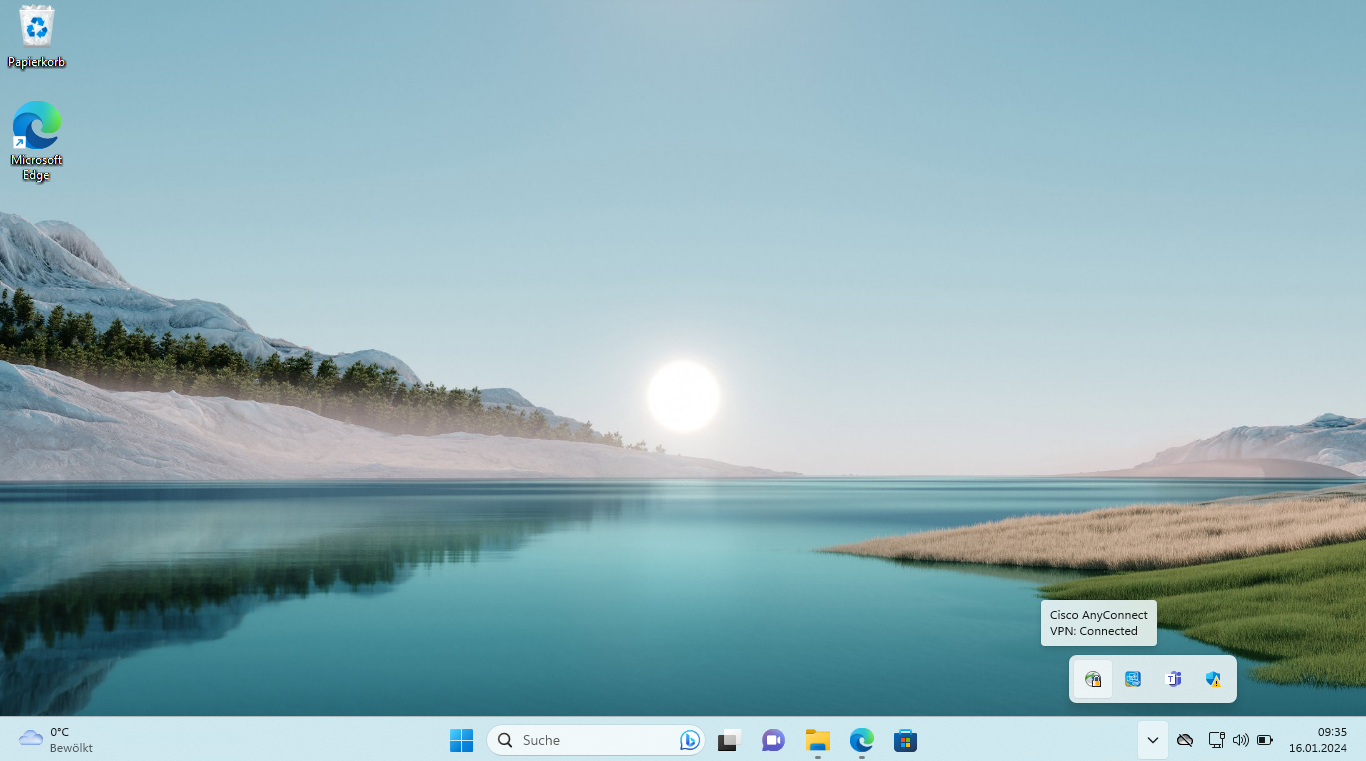
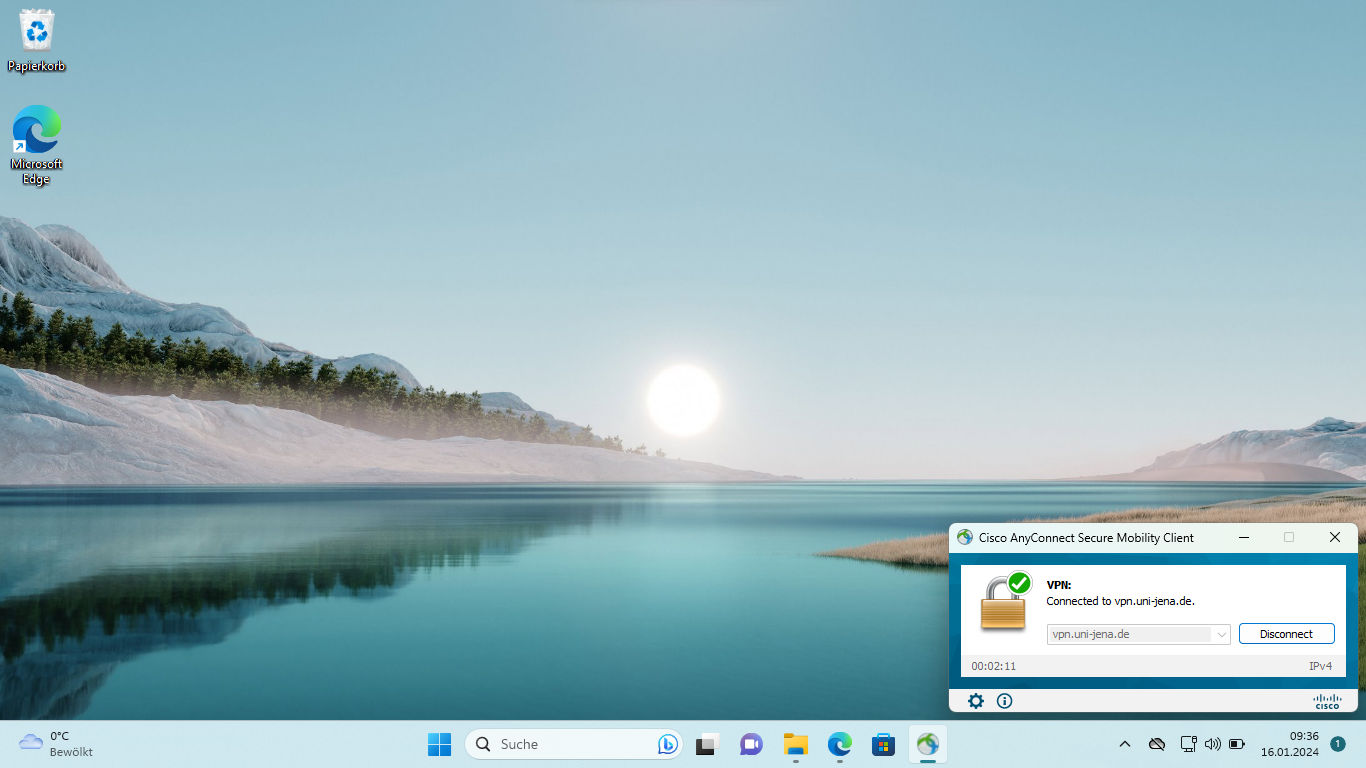
Anschließend ist der "Cisco AnyConnect Secure Mobility Client" als kleines Symbol in der Taskleiste zu finden. |
...
3. (optional) Verbindung trennenDrücken Sie mit der rechten Maustaste auf das Symbol, um weitere Optionen zu einzublenden. An dieser Stelle können Sie die Verbindung mittels [Disconnect] wieder trennen. |
...
4. (informativ) AktualisierungDie Aktualisierung des "Cisco AnyConnect Secure Mobility Client" wird automatisch vom VPN Gateway durchgeführt. Sobald Sie sich mit dem VPN Client verbinden, überprüft dieser ob ein Update vorliegt und installiert dieses automatisch.
|

...
|
...
|
...
|
...
|
...
|
...
|
| Englisch | ||||||||||
|---|---|---|---|---|---|---|---|---|---|---|
| Summary
| |||||||||
| Panel | ||||||||||
| ||||||||||
This guide is aimed at the following target groups:
Requirements
For further information and requirements for VPN service look at VPN - Zugang zum internen Universitätsnetz (uni-jena.de). Installation and the use of the VPN service1. Step: Install VPN softwareInstall the "Cisco AnyConnect Secure Mobility Client", which you can find on VPN-Verbindung für Windows, Apple, Linux und Mobil (uni-jena.de). To do this, log in with your URZ login (ger. for University Computer Center). For Windows operating systems, please download the file " |
...
cisco-secure-client-win-X.X. |
...
X.XX-core-vpn-predeploy-k9.msi". Double-click on the downloaded file to get to the installation dialog, which you should complete to the end.
2. Step: Connect to the university network |
Nach erfolgreicher Installation des VPN-Clients suchen Sie im Startmenü den "Cisco AnyConnect Secure Mobility Client" und starten diesen mit einem Linksklick.
...
After successfully installing the VPN client, search for the ‘Cisco AnyConnect Secure Mobility Client’ in the start menu and start it with a left click.
Enter "vpn.uni-jena.de" in the field that now appears and left-click the [Connect] button. |
...
After you have configured the University of Jena dial-in point, Ciso |
...
Secure Client will ask for your user name. Here enter your URZ login and add "@uni-jena.de" directly (not your mail address). Without this addition, dialing into the VPN will not be possible. After entering the corresponding password, you can establish the VPN tunnel by clicking the [OK] button. For security reasons, the login data cannot be saved and must be entered before each new connection is established. |
...
Afterwards, the "Cisco AnyConnect Secure Mobility Client" can be found as a small icon in the taskbar. |
...
3. (optional) DisconnectPress the right mouse button on the symbol to show further options. At this point you can disconnect the connection again using [Disconnect]. |
...
4. (for information) UpdateThe update of the "Cisco AnyConnect Secure Mobility Client" is performed automatically by the VPN gateway. As soon as you connect to the VPN client, it checks whether an update is available and installs it automatically. |
...
|