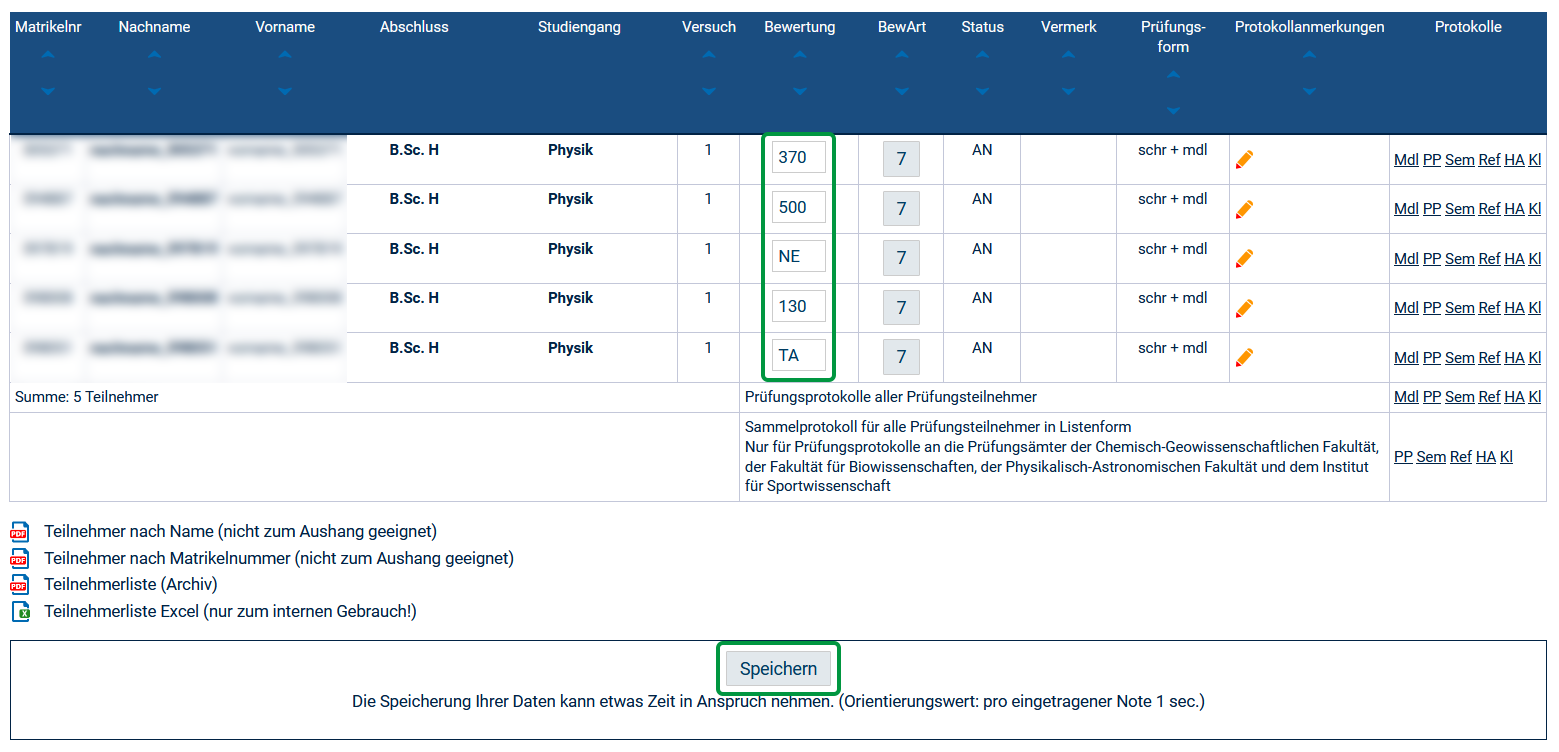
Im Menüpunkt Notenverbuchung werden die Noten eingetragen. Wählen Sie das gewünschte Semester, den Prüfungstermin und im nächsten Schritt die Prüfung aus. Ihnen wird nun eine Liste aller Prüfungsteilnehmenden angezeigt.
Bitte tragen Sie Prüfungsergebnisse in der Spalte Bewertung wie folgt ein:
benotete Prüfung | unbenotete Prüfung | |
|---|---|---|
| Prüfung bestanden | die Note als dreistellige Zahl: 100 für 1,0, 130 für 1,3, usw. Der Status wird auf BE und die Note entsprechend der Eintragung gesetzt. | ++ Der Status wird auf BE gesetzt. |
| Prüfung nicht bestanden | 500 Der Status wird auf NB und die Note auf 500 gesetzt. | -- Der Status wird auf NB gesetzt. |
| nicht zur Prüfung erschienen | NE Der Status wird auf NB, die Note auf 500 und der Vermerk auf NE gesetzt. | UNE Der Status wird auf NB und der Vermerk auf NE gesetzt. |
Bei einer Täuschung tragen Sie bitte den Wert TA ein.
Speichern Sie anschließend Ihre Eintragungen. Nach erfolgreichem Speichern werden die Zeilen grün eingefärbt angezeigt (siehe auch Notenverbuchung - Schnittstelle nicht offen).
In der Spalte BewArt (Bewertungsart) können Sie sich die zulässigen Notenausprägungen und Vermerke anzeigen lassen (siehe auch Notenverbuchung - Unzulässiger Wert).
In der Spalte Protokollanmerkungen können Sie zusätzliche textliche Angaben, z.B. den Inhalt der mündlichen Prüfung hinterlegen.
Ihnen stehen Prüfungsprotokolle für verschiedene Prüfungsformen als Einzelprotokolle und als Sammelprotokolle zur Verfügung. Wählen Sie die passenden Prüfungsprotokolle und schicken Sie sie unterschrieben an das Prüfungsamt:
Bitte nutzen Sie die Prüfungsprotokolle entsprechend der Vorgaben des zuständigen Prüfungsamtes (siehe auch Anmerkungen im Prüfungsprotokoll).
Änderung von Noten: Wenn Noteneintragungen gespeichert wurden, können diese nicht mehr durch den Prüfer oder Eingabevertreter geändert werden, sondern nur noch durch das Prüfungsamt. Sollte es bei Noten Änderungsbedarf geben, klicken Sie bitte auf die zu ändernde Note. Es öffnet sich ein Änderungsprotokoll, das Sie bitte ausfüllen und an das zuständige Prüfungsamt senden.


